cooksey cawthorne exercises pdf

PDF

cooksey cawthorne exercises pdf

Understanding Cawthorne-Cooksey Exercises

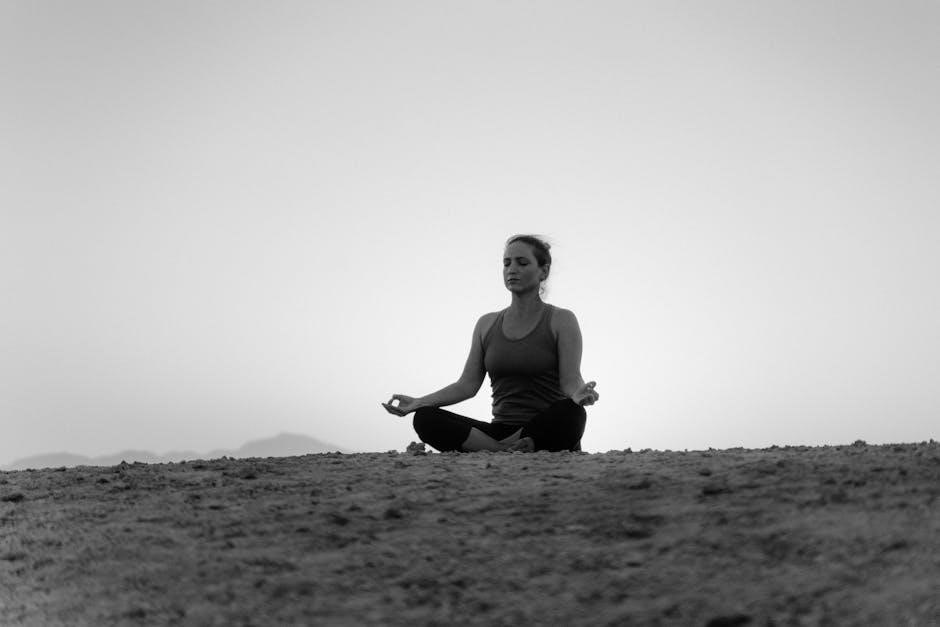
Cawthorne-Cooksey exercises, often found in PDF guides, are a structured program designed to alleviate vertigo and dizziness stemming from inner ear imbalances.

What are Cawthorne-Cooksey Exercises?

Cawthorne-Cooksey exercises are a specific series of movements meticulously crafted to address balance disorders and the resulting sensations of vertigo or giddiness. Frequently detailed within PDF resources, these exercises systematically challenge the vestibular system – the inner ear component responsible for spatial orientation.

They encompass a progressive approach, starting with simple eye movements and gradually incorporating head, shoulder, and full-body motions. These aren’t merely random exercises; they’re designed to promote neuroplasticity, helping the brain compensate for inner ear dysfunction. Many PDF guides, like those from St. George’s Hospital, provide detailed instructions for safe and effective implementation.

The History and Development

Cawthorne-Cooksey exercises originated from the work of Dr. Cawthorne and Miss Cooksey at St. George’s Hospital in London during the 1940s. Recognizing the need for rehabilitation following inner ear damage, they developed a program to retrain balance. Early documentation, often found in historical PDF archives, outlined the foundational principles.

Initially focused on pilots experiencing spatial disorientation, the exercises were adapted for broader vestibular disorders. Over time, the program evolved, with refinements based on understanding neuroplasticity. Modern PDF guides reflect this evolution, offering structured levels and symptom grading scales for effective patient management.

Vestibular Rehabilitation and its Role

Vestibular rehabilitation, utilizing exercises like Cawthorne-Cooksey, aims to improve balance and reduce dizziness through neuroplasticity. These exercises, detailed in readily available PDF resources, aren’t a cure, but help the brain compensate for inner ear dysfunction. The program’s role is crucial in conditions like Ménière’s disease and vestibular neuritis.

PDF guides emphasize a progressive approach, starting with simple eye movements and advancing to coordinated body motions. Rehabilitation focuses on habituation – reducing sensitivity to provoking stimuli – and improving gaze stability. Accessing a comprehensive PDF is key to understanding the program’s scope and benefits.

The Underlying Principles

Cawthorne-Cooksey exercises, often detailed in a PDF format, leverage neuroplasticity and habituation to retrain the brain and minimize dizziness symptoms.

Habituation Training Explained

Habituation training, a core component of Cawthorne-Cooksey exercises – frequently outlined in accessible PDF resources – aims to desensitize the vestibular system. Repeated exposure to provoking movements, detailed within the PDF guides, gradually reduces the brain’s exaggerated response to dizziness triggers. This process isn’t about eliminating the sensation entirely, but rather diminishing its intensity and the associated distress.

By consistently performing the exercises, as illustrated in the PDF, the brain learns that these movements aren’t dangerous, effectively “rewiring” its response. This leads to improved balance and a reduced feeling of vertigo, ultimately enhancing quality of life for individuals seeking relief through these targeted exercises.

Vestibular Compensation Mechanisms

Cawthorne-Cooksey exercises, often detailed in comprehensive PDF guides, leverage the brain’s natural vestibular compensation mechanisms. When the inner ear is impaired, the brain attempts to recalibrate, relying more on vision and proprioception. These exercises, as outlined in the PDF resources, actively encourage this process.

Through repetitive movements – eye, head, and body – the brain learns to reinterpret sensory input and maintain balance despite the vestibular deficit. The PDF guides emphasize consistent practice to strengthen these compensatory pathways, ultimately reducing dizziness and improving stability. This natural ability is key to recovery, and the exercises facilitate it.

Neuroplasticity and Exercise

Cawthorne-Cooksey exercises, readily available in detailed PDF formats, fundamentally rely on neuroplasticity – the brain’s remarkable ability to reorganize itself. These exercises aren’t simply about physical movement; they’re about retraining the neural pathways responsible for balance and spatial orientation.

PDF guides highlight how repeated practice of these movements stimulates the creation of new neural connections and strengthens existing ones. This process allows the brain to adapt to vestibular dysfunction, effectively “rewiring” itself to compensate for the inner ear’s impairment. Consistent exercise, as detailed in the PDFs, is crucial for maximizing neuroplastic changes.

Levels of Exercises – A Progressive Approach

Cawthorne-Cooksey exercises, detailed in PDF resources, progress through four levels – eye, head, body, and coordinated movements – gradually increasing in difficulty.

Level 1: Basic Eye Movements

Level 1 of Cawthorne-Cooksey exercises, often outlined in PDF guides, focuses on stabilizing vision during head movements. This foundational stage involves performing gaze stabilization exercises in horizontal, vertical, and diagonal planes.

These exercises aim to improve the brain’s ability to interpret visual input accurately, even when the head is moving. Patients typically fix their gaze on a specific point while moving their eyes, then progress to moving their head while maintaining focus.

PDF resources emphasize consistent practice, typically three times daily, to enhance vestibular function and reduce dizziness.

Horizontal Gaze Stabilization

Horizontal gaze stabilization, detailed in Cawthorne-Cooksey PDF resources, begins with focusing on a target while slowly turning the head from side to side. Maintain a clear, steady gaze on the chosen point throughout the movement.

Initially, perform this exercise slowly, gradually increasing the speed as tolerated. The goal is to prevent blurring or jumping of the visual target. PDF guides often suggest starting with small head turns and progressively increasing the range of motion.

Repeat this exercise multiple times, three times daily, to improve visual tracking and reduce dizziness.

Vertical Gaze Stabilization

Vertical gaze stabilization, as outlined in Cawthorne-Cooksey PDF materials, involves maintaining focus on a stationary target while moving the head up and down. Similar to horizontal stabilization, the aim is to keep the target clear and avoid blurry vision.

Begin with slow, controlled head movements, gradually increasing the speed as your symptoms allow. PDF guides emphasize the importance of consistent practice, typically three times a day.

Focus on maintaining a steady gaze, and if blurring occurs, reduce the speed or range of motion. This exercise helps improve visual stability during vertical head movements.

Diagonal Gaze Stabilization

Diagonal gaze stabilization, detailed in Cawthorne-Cooksey PDF resources, builds upon horizontal and vertical exercises. It challenges the visual system by combining both movements simultaneously. Maintain focus on a fixed point while moving your head diagonally – up and to the side, then down and to the other side.

PDF guides recommend starting slowly and increasing speed as tolerated, monitoring for any blurring. Consistent practice, three times daily, is crucial for improvement.

This exercise enhances the brain’s ability to process complex visual input during dynamic head movements.

Level 2: Head Movements

Level 2, as outlined in Cawthorne-Cooksey PDF guides, progresses beyond eye movements to incorporate head motions. These exercises aim to retrain the vestibular system’s ability to maintain balance during head turns. Begin with slow, controlled movements, gradually increasing range and speed as symptoms allow.

PDF resources emphasize performing these movements three times daily. Focus on maintaining a clear gaze and minimizing dizziness. This level prepares the body for more complex, coordinated movements, building confidence and reducing imbalance.

Head Turns – Side to Side

Cawthorne-Cooksey PDF guides detail this exercise as a foundational head movement. Slowly turn your head from side to side, keeping your shoulders relaxed and your gaze fixed on a stationary point. Initially, small movements are key; avoid pushing through significant dizziness.

Repeat this motion consistently, three times a day, as instructed in most PDF resources. Gradually increase the speed and range of motion as your tolerance improves. Focus on maintaining a steady gaze throughout the exercise to enhance vestibular adaptation.

Head Tilts – Ear to Shoulder

Cawthorne-Cooksey PDF instructions emphasize controlled head tilts. Gently tilt your head towards each shoulder, aiming to bring your ear closer to your shoulder without lifting your shoulder up. Maintain a relaxed posture and avoid straining your neck muscles.

As outlined in many PDF guides, perform this exercise three times daily, monitoring your symptom levels. Begin with small tilts and progressively increase the range as dizziness subsides. Focus on keeping your eyes open and fixed on a target to challenge your visual-vestibular system.

Head Flexion and Extension

Cawthorne-Cooksey PDF resources detail head flexion and extension exercises for vestibular rehabilitation. Slowly lower your chin towards your chest (flexion), then gently lift your head back, looking up towards the ceiling (extension). Maintain a slow, controlled pace throughout the movement, avoiding any jerky motions.

As detailed in patient PDF leaflets, perform this exercise three times a day, grading your symptoms. Start with a small range of motion and gradually increase it as tolerated. Focus on maintaining a stable gaze during the exercise to further challenge your balance system.

Level 3: Body and Shoulder Movements

Cawthorne-Cooksey PDF guides progress to Level 3, incorporating body and shoulder movements to enhance vestibular rehabilitation. These exercises, often detailed in patient leaflets, aim to improve balance and reduce dizziness. Begin with shoulder shrugs, lifting shoulders up and down, followed by trunk twists, gently rotating the upper body.

Body sway exercises – shifting weight forward and backward – are also included. PDF resources emphasize performing these movements slowly and controlled, three times daily, while monitoring symptom severity. Gradual progression is key, as outlined in St; George’s Hospital materials.

Shoulder Shrugs

As detailed in many Cawthorne-Cooksey PDF resources, shoulder shrugs form a crucial part of Level 3 exercises. These movements, often found in patient guides from hospitals like St. George’s, involve lifting your shoulders upwards towards your ears, then relaxing them downwards.

Perform these slowly and deliberately, maintaining good posture. PDF instructions typically recommend repeating this 10-15 times, three times a day. Monitor your dizziness levels, grading symptoms as you proceed, as outlined in exercise programs. This helps build tolerance and improve balance.

Trunk Twists

Cawthorne-Cooksey PDF guides frequently include trunk twists as a Level 3 exercise, vital for improving balance and reducing dizziness. These involve gently twisting your upper body from side to side, keeping your hips relatively stable.

Instructions, often found in resources from audiovestibular medicine departments, suggest performing 10-15 repetitions, three times daily. As with other exercises, monitor symptom severity – grading your dizziness – to ensure you’re progressing safely. These twists aid vestibular compensation, a key principle detailed in exercise PDFs.

Body Sway – Forward and Back

Cawthorne-Cooksey PDF resources commonly feature body sways as a Level 3 exercise, designed to challenge and retrain your balance mechanisms. Stand with feet shoulder-width apart and gently shift your weight forward onto your toes, then backward onto your heels.

Many PDF guides, like those from St. George’s Hospital, recommend 10-15 repetitions, performed three times a day. Pay close attention to any dizziness, grading your symptoms as outlined in the exercise program. This movement supports vestibular compensation, a core concept explained within these PDFs.

Level 4: Coordinated Movements

Cawthorne-Cooksey PDF guides detail Level 4 as the most challenging, integrating multiple movements simultaneously. These exercises, like walking while turning your head, or reaching for objects with head motion, aim to restore natural coordination.

PDF resources emphasize performing these with controlled movements, monitoring for symptom exacerbation. St. George’s Hospital PDFs often suggest starting slowly and gradually increasing complexity. This level builds upon previous stages, reinforcing vestibular rehabilitation principles outlined in the complete exercise program PDF.

Walking with Head Turns

Cawthorne-Cooksey PDF resources describe walking with head turns as a Level 4 exercise, crucial for retraining balance during dynamic activity. Begin by walking at a comfortable pace, then slowly rotate your head side to side, keeping your gaze focused.

PDF guides from sources like St. George’s Hospital advise starting with small head turns and gradually increasing the range of motion. Monitor for dizziness; if symptoms arise, reduce the turn’s amplitude. Consistent practice, as detailed in the PDF, is key to vestibular compensation.

Reaching for Objects with Head Movement

Cawthorne-Cooksey PDF materials outline reaching exercises as a Level 4 progression, integrating head movement with functional tasks. While seated or standing, reach for objects placed at varying distances, simultaneously turning your head left and right, and up and down.

PDF guides emphasize maintaining balance and observing any dizziness. St. George’s Hospital PDFs suggest starting with easily reachable objects and gradually increasing the challenge. This exercise, detailed in the PDF, aims to improve coordination and reduce vertigo during everyday activities.

Combining Eye, Head, and Body Movements

Cawthorne-Cooksey PDF resources detail this advanced Level 4 exercise, integrating all components for real-world simulation. While walking, practice turning your head side-to-side, up and down, and diagonally, while simultaneously tracking an object with your eyes.

PDF guides from sources like St. George’s Hospital stress performing these movements slowly and deliberately. The goal, as outlined in the PDF, is to challenge the vestibular system and improve adaptation. Monitor symptoms closely; a PDF will advise stopping if dizziness becomes overwhelming.

Performing the Exercises Correctly

Cawthorne-Cooksey PDF guides emphasize consistency: three times daily for at least two weeks, grading symptom severity throughout each session, as detailed within.

Frequency and Duration

Cawthorne-Cooksey exercises, as outlined in available PDF resources, require a dedicated commitment for optimal results. The standard recommendation, consistently highlighted across various guides, is to perform the exercise regimen three times each day. These sessions should be strategically spaced – morning, lunchtime, and evening – to ensure consistent vestibular stimulation.

A minimum duration of two weeks is generally advised, though this can be adjusted based on individual progress and under the guidance of a healthcare professional. Consistent adherence to this frequency and duration is crucial for facilitating the neuroplastic changes necessary to compensate for vestibular dysfunction, as detailed within comprehensive PDF instructions.

Grading Your Symptoms

Many Cawthorne-Cooksey exercise PDF guides emphasize the importance of symptom monitoring during each session. A grading scale is typically provided to objectively assess dizziness or imbalance levels. This allows for personalized adjustments to the exercise intensity. Regularly noting symptom severity – before, during, and after exercises – helps track progress and identify potential overstimulation.

The scale often ranges from zero (no symptoms) to ten (incapacitating symptoms). Consistent symptom grading, as detailed in the PDF resources, provides valuable feedback to both the patient and their healthcare provider, ensuring a safe and effective rehabilitation process.

Important Considerations & Safety

Cawthorne-Cooksey exercise PDF materials consistently highlight safety as paramount. Begin slowly and stop immediately if symptoms worsen significantly; Perform exercises in a safe environment, ideally near a stable surface to prevent falls. Avoid exercising when fatigued or unwell.

These exercises are graded; don’t progress to higher levels prematurely. A PDF guide will often advise performing exercises three times daily for at least two weeks, but adherence should be guided by a healthcare professional. Always consult your doctor before starting, especially with pre-existing conditions.

Conditions Benefiting from these Exercises

Cawthorne-Cooksey exercises, detailed in many PDF resources, are particularly helpful for Ménière’s disease, BPPV, and vestibular neuritis/labyrinthitis sufferers.

Ménière’s Disease

Ménière’s disease, a disorder of the inner ear, often responds positively to a consistent Cawthorne-Cooksey exercise regimen, frequently outlined in accessible PDF guides. These exercises aim to manage the episodic vertigo, tinnitus, and fluctuating hearing loss characteristic of the condition.

By promoting vestibular compensation, the exercises help the brain adapt to the disrupted signals from the affected ear. PDF resources emphasize a progressive approach, starting with basic eye movements and gradually incorporating head, body, and coordinated movements. Regular practice, as detailed in these guides, can significantly reduce the frequency and severity of Ménière’s-related dizziness, improving overall quality of life for those affected.

Benign Paroxysmal Positional Vertigo (BPPV)

While Cawthorne-Cooksey exercises, detailed in readily available PDF resources, aren’t a direct ‘cure’ for Benign Paroxysmal Positional Vertigo (BPPV), they play a crucial supportive role. These exercises, often prescribed alongside canalith repositioning maneuvers, help the vestibular system adapt and compensate after treatment.

PDF guides highlight the importance of consistent practice to minimize residual dizziness and prevent recurrence. The progressive nature of the exercises – starting with gaze stabilization and advancing to coordinated movements – aids in retraining the brain to interpret balance signals accurately. Regular exercise, as outlined in these guides, can enhance long-term stability.

Vestibular Neuritis/Labyrinthitis

Cawthorne-Cooksey exercises, comprehensively detailed in numerous PDF guides, are particularly beneficial for individuals recovering from Vestibular Neuritis/Labyrinthitis. These conditions involve inflammation of the inner ear, disrupting balance signals. The exercises aim to promote central compensation – the brain’s ability to adapt to reduced vestibular input.

PDF resources emphasize a progressive approach, starting with simple eye movements and gradually incorporating head and body motions. Consistent practice, typically three times daily, is key to retraining the vestibular system. These exercises, as outlined in the guides, help reduce dizziness, improve stability, and accelerate recovery.

Finding a Cawthorne-Cooksey PDF Resource

PDF guides detailing Cawthorne-Cooksey exercises are readily available online, offering structured programs for managing vertigo and improving balance through targeted movements.

Reliable Sources for PDF Guides

Finding trustworthy PDF resources for Cawthorne-Cooksey exercises is crucial for safe and effective practice. St. George’s Hospital is frequently cited as a premier source, offering comprehensive leaflets designed for patients experiencing vestibular issues like Ménière’s disease. These guides typically detail the exercise progression, symptom grading scales, and important safety considerations.

Beyond hospital resources, reputable audiology websites and vestibular rehabilitation clinics often provide downloadable PDFs. Always prioritize sources affiliated with healthcare professionals or institutions to ensure the information is accurate and up-to-date. Be cautious of generic websites lacking clear authorship or medical oversight, as their content may be unreliable or even harmful.

What to Look for in a PDF Guide

A quality Cawthorne-Cooksey exercise PDF should clearly outline each exercise level – from basic eye movements to coordinated body motions – with detailed instructions and illustrations. Look for a guide that emphasizes a progressive approach, allowing gradual increases in difficulty. Crucially, it must include a symptom grading scale to monitor your response and prevent overexertion.

The PDF should also address frequency and duration recommendations (typically three times daily for several weeks) and highlight essential safety precautions. Information regarding when to consult a healthcare professional is vital. A good resource will be authored or reviewed by an audiologist or vestibular specialist, ensuring accuracy and reliability.

St. George’s Hospital Resources

St. George’s Hospital is a recognized leader in audiovestibular medicine and provides valuable resources regarding Cawthorne-Cooksey exercises. Their website often features patient leaflets and PDF guides detailing the exercise program for vestibular problems like Ménière’s disease. These resources are developed by experienced clinicians and offer comprehensive instructions.

Look for downloadable materials outlining the exercise levels, symptom grading scales, and important safety considerations. St. George’s materials are frequently referenced for their clarity and effectiveness in guiding patients through self-management of dizziness and balance issues. Accessing their resources can provide a reliable foundation for your rehabilitation.

Working with a Healthcare Professional

PDF guides are helpful, but a healthcare professional—like an audiologist—can personalize Cawthorne-Cooksey exercises, ensuring safety and maximizing your recovery potential.

The Role of an Audiologist

Audiologists play a crucial role in vestibular rehabilitation, including Cawthorne-Cooksey exercises. They expertly assess your balance function, pinpointing the specific cause of your dizziness. Utilizing a PDF resource as a starting point, they then tailor an exercise program to your unique needs and symptom severity.

An audiologist doesn’t just hand you exercises; they provide detailed instruction on proper form, ensuring effectiveness and preventing injury. They monitor your progress, adjusting the program as you improve, and offer guidance on managing symptoms. They can also help determine if the PDF exercises are appropriate for your condition, or if further medical intervention is needed.

Personalized Exercise Programs

While Cawthorne-Cooksey exercises, often accessed via a PDF guide, offer a foundational approach, a truly effective regimen is personalized. Generic programs may not address the specific nuances of your vestibular disorder. A healthcare professional assesses your individual deficits – eye movements, head stability, balance – to create a tailored plan.

This customization considers symptom severity, progression rate, and any co-existing conditions. The program isn’t static; it evolves as you improve, increasing challenge and complexity. Utilizing a PDF as a reference, your therapist will modify exercises, adjust frequency, and ensure optimal results, maximizing your recovery potential.

When to Seek Medical Advice

Though Cawthorne-Cooksey exercises, detailed in a PDF resource, are generally safe, promptly consult a doctor if symptoms worsen despite consistent practice. New or severe headaches, double vision, or hearing loss accompanying dizziness require immediate attention. If exercises induce nausea or significantly increase imbalance, stop and seek guidance.

Don’t self-diagnose; a professional evaluation is crucial. A PDF guide isn’t a substitute for medical expertise. If your condition doesn’t improve within a reasonable timeframe, or if you experience any concerning neurological symptoms, professional medical advice is essential for accurate diagnosis and treatment.

PDF

coachman owner’s manual pdf free download

Article Plan: Coachmen Owners Manual PDF Free Download (as of 12/13/2025)

Finding your Coachmen RV manual online is now easier than ever! Coachmen provides a comprehensive archive of owner manuals directly on their website, accessible by year.

Embarking on RV adventures with a Coachmen travel trailer, fifth wheel, or motorhome is an exciting experience. However, having quick access to your owner’s manual is crucial for safe operation, maintenance, and troubleshooting. Fortunately, Coachmen RV makes locating your manual in PDF format remarkably straightforward, offering a centralized online resource. This guide will detail how to navigate the Coachmen website and other helpful avenues to secure the documentation you need, ensuring a smooth and enjoyable journey.

Many RV owners initially search for manuals online, and while various sources exist, the official Coachmen RV website remains the primary and most reliable location. SteveNC, a helpful contributor on Class B forums, emphasizes the ease of access, directing users to the “MANUALS” section on the site. From there, you can easily browse by year to pinpoint the correct manual for your specific model. This eliminates the risk of using outdated or inaccurate information. Remember, Coachmen also provides a wealth of informative videos on both their website and YouTube channel, supplementing the written manuals with visual guidance.

Whether you own a Catalina, Freedom Express, or another Coachmen RV, this guide will help you locate the necessary resources to maximize your ownership experience.

Official Coachmen RV Website – The Primary Source

The Coachmen RV official website (CoachmenRV.com) serves as the definitive and most up-to-date resource for obtaining owner manuals in PDF format. As highlighted by SteveNC on Class B forums, the website is meticulously organized to facilitate easy navigation and quick access to the documentation you require. This direct-from-manufacturer approach ensures you’re receiving accurate and relevant information tailored to your specific RV model and year.

Upon visiting the site, locate the dedicated “MANUALS” section. From there, a comprehensive listing of years is presented, allowing you to jump directly to the appropriate archive. This eliminates the need for extensive searching or reliance on potentially unreliable third-party sources. Coachmen’s commitment to customer support is evident in their proactive provision of these resources.

Beyond manuals, the website also hosts a valuable library of informative videos, offering visual guidance on various aspects of RV ownership and maintenance. This dual approach – comprehensive documentation and engaging video content – demonstrates Coachmen’s dedication to empowering owners with the knowledge they need for a safe and enjoyable RV lifestyle. It’s a fantastic starting point for any Coachmen owner seeking information.

Navigating the Coachmen RV Manuals Section

Once you’ve arrived at the “MANUALS” section of the Coachmen RV website, the process of locating your specific owner’s manual is straightforward. As detailed by SteveNC, the key is to carefully scan the page for the year corresponding to your RV’s manufacturing date. This chronological arrangement simplifies the search, preventing the need to sift through irrelevant documents.

The website’s layout is designed for intuitive browsing. After selecting the correct year, a list of available manuals for that period will appear; It’s important to note that for units manufactured in 2014 or earlier, a separate section is designated, requiring a slightly different navigation path. This distinction ensures that older models aren’t overlooked.

Pay close attention to the text just above the year listings; it provides helpful guidance, particularly regarding manuals for older RVs. The Coachmen team has clearly prioritized user experience, making the manual retrieval process as efficient as possible. Remember, this direct access eliminates the risks associated with downloading manuals from unofficial sources, guaranteeing authenticity and accuracy.

Locating Manuals by Year

The Coachmen RV website organizes its extensive manual library chronologically, allowing owners to pinpoint the correct documentation based on their RV’s production year. As SteveNC highlights, this feature is central to a successful search; Simply navigate to the “MANUALS” section and systematically browse through the available years until you locate the one matching your RV.

This year-based categorization is particularly useful given Coachmen’s long history and diverse range of models. Each year’s listing contains all manuals released for RVs manufactured during that period. Clicking on a specific year will expand the list, revealing downloadable PDF files for various models and components.

It’s crucial to confirm the manufacturing year of your RV before beginning your search. This information is typically found on the RV’s title, registration, or a manufacturer’s plate located within the vehicle. Remember the distinction for models 2014 and older, which have a dedicated section. Utilizing this system ensures you access the most accurate and relevant manual for your specific Coachmen RV.

Accessing Manuals for RVs 2014 and Earlier

For Coachmen RV owners with models manufactured in 2014 or earlier, a specific section on the official website caters to their manual needs. As noted by SteveNC, locating these older manuals requires a slightly different approach than newer models. Look for a clearly designated link or text stating “Looking for an Owners Manual for a unit from 2014 or earlier?”

This dedicated section acknowledges the potential for different documentation formats and availability for older RVs. It’s a centralized repository for manuals that might not be directly integrated into the standard year-based browsing system. The availability of manuals for these earlier years can vary, but Coachmen strives to maintain a comprehensive archive.

Owners of vintage Coachmen RVs should prioritize checking this section first. While newer models benefit from a streamlined year-specific search, this dedicated area provides the best chance of finding the correct manual for RVs predating 2015. Patience and thorough exploration of this section are key to a successful search.

Understanding Coachmen RV Model Lines

Coachmen RV manufactures a diverse range of recreational vehicles, each with unique features and corresponding owner manuals. Recognizing your specific model line is crucial for locating the correct documentation. Popular lines include the Catalina, known for its family-friendly layouts, and the Freedom Express, celebrated for its ultra-lite design and ease of towing.

Within these broader lines, further sub-series exist, such as the Catalina Legacy Edition and the Catalina Summit Series 7, each possessing distinct characteristics. Understanding these nuances ensures you download the manual tailored to your RV’s specific configuration. The model number, typically found on a sticker near the entry door or on the RV’s title, is essential for accurate identification.

RV Trader’s extensive listings showcase the breadth of Coachmen’s offerings, highlighting models ranging in price from approximately $12,977 to $145,782. Knowing your model line streamlines the manual search process, allowing you to navigate the Coachmen website’s resources more efficiently and access the precise information needed for your RV.

Popular Coachmen RV Models (Catalina, Freedom Express)

Among Coachmen’s highly sought-after models, the Catalina series consistently ranks as a favorite, particularly the Legacy Edition and Summit Series 7. The Catalina Legacy Edition, like the 343BHTS model showcased on RV Trader, is designed with families in mind, offering spacious layouts and convenient features. Finding the correct owner’s manual for this model is vital for understanding its specific systems.

The Freedom Express Ultra Lite series caters to travelers seeking a lightweight and easily towable option. These models are known for their fuel efficiency and maneuverability. Accessing the appropriate manual ensures you’re well-equipped to maintain and operate your Freedom Express effectively.

RV Trader currently lists over 10,714 Coachmen RVs, with 6,690 new and 4,024 used options available. When searching for a manual, pinpointing your exact model – including the series and year – is paramount; Coachmen’s website provides dedicated sections for locating manuals based on these details, simplifying the process for owners of these popular RVs.

RV Trader as a Resource for Model Information

RV Trader serves as an invaluable resource not only for purchasing Coachmen RVs but also for gathering crucial model-specific information essential for locating the correct owner’s manual. With a current inventory exceeding 10,714 Coachmen RVs – encompassing 6,690 new and 4,024 used units – the platform offers detailed listings.

These listings frequently include the model year, series (such as Catalina Legacy Edition or Freedom Express Ultra Lite), and specific features. This information is critical when navigating the Coachmen RV website’s manual section. Knowing your RV’s precise details significantly narrows the search and ensures you download the appropriate PDF.

RV Trader’s price range for Coachmen RVs spans from $12,977 to $145,782, with an average price point around $32,993. While price isn’t directly related to manual availability, confirming the model details during your purchase through RV Trader will streamline the manual retrieval process. Utilizing RV Trader alongside Coachmen’s official website is a powerful combination.

Catalina Legacy Edition: Manual Availability

For owners of the Coachmen Catalina Legacy Edition, securing the correct owner’s manual is paramount for understanding the RV’s features and maintenance requirements. The Catalina Legacy Edition, a popular model known for its family-friendly design, has manuals readily available through the official Coachmen RV website.

Accessing these manuals requires navigating to the “Manuals” section and filtering by year. Given the model’s longevity, specifying the exact year of your Catalina Legacy Edition is crucial. RV Trader listings, often featuring models like the 2023 Forest River Catalina Legacy Edition 343BHTS, can help pinpoint the manufacturing year.

The manuals encompass detailed information on all systems, from plumbing and electrical to appliance operation and warranty details. Coachmen’s commitment to providing comprehensive documentation ensures owners can confidently maintain and enjoy their Catalina Legacy Edition for years to come. Remember to download the PDF for offline access during travels.

Catalina Summit Series 7: Manual Availability

Locating the owner’s manual for your Coachmen Catalina Summit Series 7 is a straightforward process facilitated by Coachmen’s online resources. This series, celebrated for its enhanced features and build quality, benefits from readily accessible documentation on the official Coachmen RV website.

Similar to the Legacy Edition, accessing the correct manual necessitates navigating to the “Manuals” section and selecting the appropriate year. Accurate year identification is vital, as specifications and features can vary between model years. Resources like RV Trader, showcasing various Catalina Summit Series 7 models, can assist in determining your RV’s production year.

These manuals provide in-depth guidance on operating and maintaining all aspects of your Summit Series 7, including its advanced systems and components. Coachmen’s dedication to comprehensive support empowers owners to maximize their RV experience and ensure long-term reliability. Download the PDF version for convenient offline access during your adventures.

Freedom Express Ultra Lite: Manual Availability

For owners of the Coachmen Freedom Express Ultra Lite, finding the corresponding owner’s manual is efficiently managed through the official Coachmen RV website. This popular series, known for its lightweight design and travel-friendly features, has readily available documentation online, mirroring the process for other Coachmen models.

The key to successful retrieval lies in navigating to the “Manuals” section of the website and accurately selecting the production year of your Ultra Lite. RV Trader listings, displaying a wide range of Freedom Express Ultra Lite models, can be invaluable in pinpointing the correct year if you’re unsure. Remember, specifications evolve with each model year.

These manuals offer detailed instructions on operation, maintenance, and troubleshooting, covering all systems within your Ultra Lite. Coachmen’s commitment to providing accessible resources ensures owners can confidently enjoy their RV and maintain its optimal performance for years to come. Download the PDF for convenient access.

Utilizing Coachmen RV’s Informative Videos

Beyond comprehensive PDF manuals, Coachmen RV significantly enhances the owner experience through a robust library of informative videos. These videos serve as a dynamic complement to the written documentation, offering visual demonstrations of key features, maintenance procedures, and troubleshooting techniques.

Coachmen recognizes the value of visual learning, and their YouTube channel is a central hub for this content. From walk-throughs of specific model interiors to detailed explanations of system operations, the videos cater to a diverse range of owner needs. This resource is particularly helpful for those who prefer a more interactive learning style.

These videos often cover topics that are difficult to fully grasp through text alone, such as winterizing procedures or operating complex appliances. By leveraging both the PDF manuals and the video library, Coachmen owners gain a thorough understanding of their RV, promoting safe and enjoyable travels. Access these resources directly from the Coachmen RV website or their official YouTube channel.

Coachmen RV on YouTube

Coachmen RV maintains an active and informative presence on YouTube, serving as a valuable extension of their owner support system. This channel isn’t merely a promotional platform; it’s a dedicated resource filled with practical guides and demonstrations designed to empower RV owners.

You’ll discover a wide array of content, including detailed walk-throughs of various Coachmen RV models, showcasing interior layouts and feature highlights. Beyond initial introductions, the channel delves into essential maintenance tasks, offering step-by-step instructions for everything from appliance operation to seasonal preparation.

Troubleshooting common issues is also a key focus, with videos addressing frequently encountered problems and providing clear solutions. This proactive approach helps owners resolve minor concerns independently, minimizing downtime and maximizing their RV experience. Finding the official Coachmen RV YouTube channel is simple – a direct link is readily available on the Coachmen RV website, ensuring easy access to this wealth of knowledge.

Tank Tightness Testing (TTT) Documentation

Coachmen RV, adhering to industry standards and regulatory requirements, provides documentation related to Tank Tightness Testing (TTT). This is a critical aspect of RV maintenance, ensuring the integrity of holding tanks and preventing potential environmental issues. The documentation outlines specific test procedures designed to detect leaks and maintain compliance.

This TTT documentation is one of four EPA standard test procedures for release detection methods, demonstrating Coachmen’s commitment to environmental responsibility. The document details these standards, alongside state-defined testing protocols, and explains their application to various tank types commonly found in Coachmen RVs.

Understanding these procedures is vital for both RV owners and technicians performing maintenance. Proper TTT helps identify potential problems early, preventing costly repairs and ensuring safe operation. While detailed instructions are often provided to authorized service centers, owners can access relevant information through Coachmen’s support resources and potentially within specific model manuals.

EPA Standard Test Procedures for Release Detection

Coachmen RV integrates Environmental Protection Agency (EPA) standard test procedures for release detection into its quality control and maintenance guidelines. These procedures are crucial for verifying the integrity of RV holding tanks and preventing the release of harmful substances into the environment. Adherence to these standards demonstrates a commitment to responsible manufacturing and environmental stewardship.

The EPA outlines specific protocols for assessing tank tightness, focusing on identifying leaks and ensuring proper sealing. These tests often involve pressurization or vacuum testing to detect any breaches in the tank walls or connections. Coachmen’s documentation references these EPA standards, providing technicians and owners with a clear understanding of the required testing methodologies.

Understanding these procedures is essential for maintaining compliance with environmental regulations and ensuring the safe operation of your RV. While detailed execution is typically handled by certified technicians, awareness of the EPA standards empowers owners to ask informed questions and ensure proper maintenance practices are followed, contributing to a sustainable RV lifestyle.

State-Defined Testing Protocols

Beyond the federal EPA standards, individual states often implement their own specific testing protocols for RV holding tank integrity and leak detection. These state-level regulations can supplement or even exceed the requirements set forth by the EPA, creating a layered approach to environmental protection and public health.

Coachmen RV acknowledges the importance of these varying state requirements and encourages owners to familiarize themselves with the regulations in their specific location. This may involve consulting with state environmental agencies or RV dealerships to understand the applicable testing procedures and frequency. Compliance with state protocols is crucial for legal operation and avoiding potential penalties.

The documentation accompanying Coachmen RVs often references the need to adhere to local regulations, emphasizing the owner’s responsibility to stay informed. Understanding these state-defined protocols, alongside the EPA standards, ensures a comprehensive approach to maintaining a safe, environmentally responsible, and legally compliant RV experience.

Common Issues & Troubleshooting (Manual Assistance)

Coachmen RV owner manuals are invaluable resources when encountering common issues with your recreational vehicle. These manuals provide detailed troubleshooting guides for a wide range of problems, from minor appliance malfunctions to more complex system failures. Often, seemingly significant issues have simple solutions outlined within the manual’s pages.

Typical areas covered include plumbing leaks, electrical system concerns (like circuit breaker trips), appliance operation, and slide-out mechanism troubleshooting. The manual’s diagrams and step-by-step instructions can empower owners to address minor repairs themselves, saving time and expense. However, it’s crucial to prioritize safety and consult a qualified technician for issues beyond your skill level.

Furthermore, the manual often includes preventative maintenance schedules, helping owners avoid potential problems through regular inspections and upkeep. Utilizing the manual effectively extends the life of your RV and ensures a more enjoyable ownership experience. Remember, the manual is your first line of defense against common RV challenges.

Alternative Sources for Manuals (Forums & Communities)

While the official Coachmen RV website remains the primary source for owner manuals, resourceful RV enthusiasts often find assistance through online forums and dedicated communities. These platforms serve as valuable repositories of shared knowledge and experiences, frequently including scanned copies of older or hard-to-find manuals.

Class B forums, in particular, can be helpful, as noted by users like SteveNC, who highlight the website’s comprehensive archive. RV-specific forums allow owners to connect with others who may have encountered similar issues and successfully located the necessary documentation. These communities often foster a collaborative spirit, with members readily sharing resources.

However, exercise caution when downloading manuals from unofficial sources. Verify the authenticity of the document and ensure it corresponds to your specific RV model and year. Cross-referencing information with the official Coachmen website is always recommended. These forums provide a supplementary resource, but official documentation should remain the priority.

Accessing your Coachmen RV’s owner manual is a crucial step towards responsible and enjoyable RV travel. Understanding your vehicle’s systems, maintenance requirements, and safety features empowers you to address potential issues proactively and prevent costly repairs; The readily available resources, particularly the official Coachmen RV website, simplify this process.

Beyond the manual itself, Coachmen’s informative videos on their website and YouTube channel offer visual guidance for various tasks, enhancing comprehension and confidence. Familiarizing yourself with tank tightness testing (TTT) procedures, as outlined in EPA standard test procedures, is also vital for environmental responsibility and compliance.

Remember, a well-maintained RV contributes significantly to a safe and stress-free travel experience. By leveraging the available documentation and community support, you can confidently embark on adventures, knowing you’re prepared for the road ahead. Prioritize safety, embrace the freedom, and enjoy the journey!

red baron mini pizza cooking instructions

Red Baron Mini Pizza Cooking Instructions: A Comprehensive Guide

Embark on a delightful culinary journey! This guide provides detailed instructions for perfectly cooked Red Baron Mini Pizzas, ensuring a crispy crust and flavorful experience every time.

Understanding Red Baron Mini Pizzas

Red Baron Mini Pizzas are a convenient and popular frozen food choice, offering a quick and easy meal or snack option. These individual-sized pizzas are designed for simplicity, requiring minimal preparation and cooking time. They typically feature a pre-made crust topped with tomato sauce, mozzarella cheese, and various toppings, catering to diverse tastes.

Understanding the composition of these mini pizzas is key to achieving optimal cooking results. The pre-baked crust requires careful attention to avoid becoming overly crispy or burnt. The cheese blend melts readily, so monitoring the cooking process is crucial to prevent excessive bubbling or separation. Red Baron prioritizes delivering a consistent and satisfying pizza experience with each bite, making them a household favorite.

Types of Red Baron Mini Pizzas Available

Red Baron Mini Pizzas boast a diverse range of flavors to satisfy every palate. Classic Pepperoni remains a perennial favorite, delivering a traditional pizza experience. For cheese lovers, the Four Cheese variety offers a rich and creamy indulgence. Those seeking a bolder taste can explore options like Supreme, loaded with pepperoni, sausage, vegetables, and more.

Beyond these staples, Red Baron frequently introduces limited-edition and seasonal flavors, keeping the selection fresh and exciting. Variations featuring different cheese blends, sauce types, or unique topping combinations are common. Understanding the specific ingredients in each type is helpful, as cooking times may slightly vary based on topping density and moisture content, ensuring a perfectly cooked mini pizza every time;

Nutritional Information for Red Baron Mini Pizzas

Understanding the nutritional content of Red Baron Mini Pizzas is essential for balanced eating. Each mini pizza typically contains around 220-280 calories, depending on the variety and toppings. Fat content ranges from 8-12 grams, with saturated fat contributing approximately 3-5 grams. Sodium levels are generally between 350-450mg per pizza, so moderation is key.

Protein content is around 8-10 grams, offering a small protein boost. Carbohydrates typically fall within the 25-35 gram range. It’s important to consult the specific packaging for precise nutritional details, as values can differ between flavors. This information allows for informed portion control and integration into a healthy diet alongside other food choices.

Preparing to Cook Your Red Baron Mini Pizza

Get ready for pizza perfection! Ensure a seamless cooking experience by gathering your supplies and prepping for optimal results with these simple steps.

Oven Temperature and Preheating

Achieving the ideal bake hinges on precise temperature control. For Red Baron Mini Pizzas, a conventional oven should be preheated to 375°F (190°C). Preheating is absolutely crucial; it ensures even cooking and a delightfully crispy crust. Allow approximately 10-15 minutes for your oven to reach the desired temperature. Do not attempt to cook the pizzas in a cold oven, as this will result in an undercooked and potentially soggy final product.

Using an oven thermometer is highly recommended to verify the accuracy of your oven’s temperature setting. Variations can occur, and a precise temperature guarantees consistent results. Remember, a properly preheated oven is the foundation for a truly satisfying Red Baron Mini Pizza experience!

Necessary Cooking Utensils

Preparing for pizza perfection requires minimal, yet essential, tools. You’ll need a baking sheet – a standard size will comfortably accommodate several Red Baron Mini Pizzas. Alternatively, a pizza stone can elevate the crust’s crispiness, though it’s not mandatory. Oven mitts are absolutely vital for safely handling the hot baking sheet or pizza stone. A pizza cutter or a sharp knife is needed for easy slicing and serving.

A spatula can be helpful for gently transferring the pizzas if needed. While not strictly required, parchment paper placed under the pizzas can prevent sticking and simplify cleanup. Ensure all utensils are clean and dry before use for optimal results and food safety.

Checking the Expiration Date

Prioritizing freshness is key to enjoying Red Baron Mini Pizzas at their best. Before you even preheat the oven, locate the “Best By” or expiration date printed on the pizza’s packaging. Consuming the pizza past this date doesn’t necessarily mean it’s unsafe, but the quality – particularly the texture and flavor – may diminish.

Look for any signs of damage to the packaging, such as tears or punctures, which could compromise the pizza’s freshness. A properly stored, unopened pizza within its expiration date should offer a delightful experience. Always err on the side of caution; if you’re unsure, it’s best to discard it.

Cooking Methods: Detailed Instructions

Unlock pizza perfection! We’ll explore three popular cooking methods – conventional oven, toaster oven, and air fryer – each offering unique results for your Red Baron Mini Pizzas.

Conventional Oven Cooking Instructions

Achieve classic oven-baked goodness! This method delivers a consistently cooked pizza with a delightfully crispy crust. Begin by preheating your oven to 375°F (190°C). Ensure the oven rack is positioned in the center for even heat distribution. Carefully remove the Red Baron Mini Pizza from its packaging and place it directly onto a baking sheet – no parchment paper is needed.

Bake for 12-15 minutes, or until the cheese is melted and bubbly, and the crust is golden brown. Cooking time may vary slightly depending on your oven’s calibration. For optimal results, rotate the baking sheet halfway through the cooking process to ensure uniform browning. Once cooked, carefully remove the pizza from the oven and let it cool for a minute or two before enjoying. This allows the cheese to set slightly, preventing messy bites!

Step-by-Step Oven Cooking Guide

Let’s bake the perfect mini pizza! Step 1: Preheat oven to 375°F (190°C). Step 2: Remove pizza from packaging. Step 3: Place pizza directly onto a baking sheet. Avoid using parchment paper for optimal crust crispness. Step 4: Bake for 12-15 minutes. Monitor closely, as ovens vary.

Step 5: Rotate the baking sheet halfway through for even cooking. This ensures consistent browning across the entire pizza. Step 6: Check for melted, bubbly cheese and a golden-brown crust. Step 7: Carefully remove from oven using oven mitts. Step 8: Let cool for 1-2 minutes before serving. Enjoy your perfectly baked Red Baron Mini Pizza!

Toaster Oven Cooking Instructions

Craving a quick mini pizza fix? The toaster oven is your friend! Step 1: Preheat toaster oven to 375°F (190°C). Ensure sufficient clearance above the pizza. Step 2: Place the mini pizza directly on the toaster oven rack or a small baking pan. Step 3: Bake for 8-12 minutes.

Step 4: Keep a close watch, as toaster ovens cook faster. Rotate halfway through for even heating. Step 5: Look for melted cheese and a golden-brown crust. Step 6: Carefully remove with tongs or oven mitts. Step 7: Let cool briefly before enjoying. Toaster ovens deliver a surprisingly crispy result for a speedy snack!

Optimizing Toaster Oven Results

Maximize your mini pizza perfection! For an extra crispy crust, lightly brush the rack with oil before placing the pizza. This prevents sticking and promotes even browning. If your toaster oven has a “bake” setting, use it; otherwise, a lower “toast” setting can work, extending cooking time slightly.

Monitoring is key: Toaster ovens vary, so check frequently after 8 minutes. If the cheese browns too quickly, lower the temperature slightly. A small piece of aluminum foil under the pizza can help catch any drips. Remember, smaller toaster ovens may require shorter cooking times. Enjoy a perfectly toasted Red Baron Mini Pizza!

Air Fryer Cooking Instructions

Achieve crispy perfection with air frying! Preheat your air fryer to 350°F (175°C) for optimal results. Place the Red Baron Mini Pizza directly on the air fryer basket – parchment paper isn’t usually needed, but can prevent sticking. Cook for approximately 6-8 minutes, checking halfway through.

For even cooking: Gently shake the basket halfway to ensure uniform browning. Air fryers cook quickly, so watch closely to prevent burning. The crust should be golden brown and the cheese melted and bubbly. Enjoy a quick and delightfully crispy Red Baron Mini Pizza, perfectly cooked in minutes!

Achieving Crispy Crust in an Air Fryer

Maximize crispiness with these tips! Ensure the air fryer basket isn’t overcrowded; cook pizzas in batches for best results. A slightly preheated air fryer (350°F/175°C) is crucial for a quick, even cook. Avoid using oil sprays, as they can sometimes affect the air fryer’s non-stick coating.

For extra crunch: During the last minute of cooking, increase the temperature to 375°F (190°C) – monitor closely to prevent burning. Shaking the basket halfway through ensures all sides get exposed to the hot air, promoting even crisping. Enjoy a delightfully crunchy Red Baron Mini Pizza, thanks to the power of air frying!

Troubleshooting Common Cooking Issues

Don’t despair! This section addresses frequent problems like undercooked or burnt pizzas, and toppings slipping, offering quick fixes for pizza perfection.

Pizza is Undercooked

Identifying an Undercooked Pizza: If your Red Baron Mini Pizza emerges from the oven with a pale crust and cheese that hasn’t fully melted and bubbled, it’s likely undercooked. The center may appear doughy, and the overall texture will be soft rather than crispy.

Solutions: First, ensure your oven reached the correct preheated temperature. If it didn’t, increase the cooking time by 2-3 minutes. If the oven temperature was accurate, simply return the pizza to the oven for additional cooking. Place it directly on the oven rack or baking sheet. Check it every minute to prevent overcooking. For smaller mini pizzas, a slightly longer cook time is often necessary to ensure thorough heating. Consider slightly raising the oven rack for more direct heat.

Prevention: Avoid overcrowding the oven, as this can lower the temperature and hinder even cooking.

Pizza is Overcooked/Burnt

Recognizing an Overcooked Pizza: An overcooked Red Baron Mini Pizza will exhibit a dark, hard crust, potentially with burnt edges. The cheese may appear browned and brittle, and the toppings could be dried out or even scorched. A burnt smell is a clear indicator of overcooking.

Remedial Actions: Unfortunately, a severely burnt pizza is often beyond saving. However, if only the edges are slightly burnt, carefully trim those portions away with a pizza cutter or knife. If the entire pizza is just overcooked but not burnt, you might try adding a tiny sprinkle of water to rehydrate it slightly, but results will vary.

Preventative Measures: Closely monitor the pizza during the final minutes of cooking. Reduce the oven temperature slightly if you notice it browning too quickly. Avoid leaving the pizza unattended, especially in toaster ovens or air fryers.

Toppings are Sliding Off

Identifying the Issue: If your Red Baron Mini Pizza’s toppings are sliding off during cooking, it usually indicates insufficient adhesion. This can happen if the pizza wasn’t frozen properly initially, or if there’s excessive moisture beneath the toppings. A greasy pizza base can also contribute to this problem;

Corrective Steps: Carefully reposition the toppings while the pizza is still hot, gently pressing them back into the cheese. If the issue is severe, consider placing the pizza back in the oven for a minute or two to help the cheese re-melt and secure the toppings.

Preventative Strategies: Ensure the pizza remains frozen until cooking. Avoid adding extra oily toppings. Placing parchment paper under the pizza can help absorb excess moisture and provide better grip.

Enhancing Your Red Baron Mini Pizza Experience

Elevate your pizza night! Explore creative additions like extra cheese, fresh herbs, or flavorful dipping sauces for a truly customized and satisfying meal.

Adding Extra Toppings

Unleash your inner chef! Red Baron Mini Pizzas are a fantastic base for culinary creativity. Feel free to personalize your pizza with a variety of delicious toppings before cooking. Consider adding a sprinkle of your favorite shredded cheese – mozzarella, cheddar, or a blend – for an extra gooey experience.

For a burst of flavor, incorporate thinly sliced pepperoni, cooked sausage crumbles, or diced ham. Fresh vegetables like sliced mushrooms, bell peppers, or onions can also elevate the taste. A scattering of black olives or a pinch of red pepper flakes adds a delightful kick. Remember to avoid overloading the pizza, as this can lead to uneven cooking and soggy results. A light touch ensures a perfectly balanced and flavorful mini pizza!

Dipping Sauces Recommendations

Elevate your pizza experience! While Red Baron Mini Pizzas are delicious on their own, a complementary dipping sauce can take them to the next level. For a classic pairing, try marinara sauce – its tangy sweetness perfectly complements the pizza’s flavors. Ranch dressing is another popular choice, offering a creamy and herbaceous counterpoint.

If you prefer a spicier kick, consider a sriracha mayo or a garlic aioli. For a Mediterranean twist, hummus provides a creamy and flavorful dip. Don’t underestimate the simplicity of a good quality olive oil with a sprinkle of Italian herbs. Experiment with different sauces to discover your perfect match! A small bowl of your chosen sauce alongside your mini pizza creates a truly satisfying snack.

Serving Suggestions & Side Dishes

Complete your meal! Red Baron Mini Pizzas are fantastic as a quick snack, lunch, or part of a larger spread. For a light meal, pair them with a fresh garden salad – the crisp greens and vibrant vegetables offer a delightful contrast to the pizza’s richness. A side of steamed or roasted vegetables, like broccoli or carrots, adds a healthy boost.

For a more substantial meal, consider serving them alongside chicken tenders or mozzarella sticks. A simple fruit salad provides a sweet and refreshing finish. Don’t forget a cool beverage! Soda, iced tea, or even a sparkling water with a slice of lemon are excellent choices. Creating a fun pizza night with friends and family is always a great idea!

Safety Precautions When Cooking

Prioritize safety! Always use oven mitts when handling hot pizzas and cookware. Supervise children closely, and ensure proper ventilation during cooking for a safe experience.

Oven Safety Guidelines

Maintaining a safe oven environment is paramount. Before preheating, ensure the oven rack is securely positioned. Always use oven mitts or pot holders when inserting or removing the Red Baron Mini Pizzas, as surfaces become extremely hot.

Never leave a preheating or operating oven unattended; Keep flammable materials, such as dish towels and paper products, well clear of the oven’s vicinity. Regularly inspect the oven door seal for damage, as a compromised seal can lead to heat loss and potential safety hazards.

If you detect any unusual smells or smoke emanating from the oven, immediately turn it off and unplug it; Avoid using abrasive cleaners on the oven’s interior, as they can damage the surface. Finally, allow the oven to cool completely before attempting any cleaning or maintenance.

Handling Hot Pizzas

Exercise extreme caution when handling freshly baked Red Baron Mini Pizzas! The pizza and its baking sheet will be intensely hot immediately after removal from the oven, posing a burn risk. Always utilize oven mitts or heat-resistant gloves to protect your hands.

Carefully lift the pizza using the baking sheet or a pizza cutter, avoiding direct contact with the hot surface. Place the cooked pizza on a heat-safe cutting board or surface to prevent damage to countertops. Allow the pizza to cool slightly before cutting and serving, minimizing the risk of burns to your mouth.

Supervise children closely when hot pizza is present. Remind everyone to exercise caution and avoid touching the hot pizza or baking sheet. Proper handling ensures a safe and enjoyable pizza experience.

Storage of Leftover Pizza

Proper storage is key to enjoying leftover Red Baron Mini Pizza! Allow the pizza to cool completely before storing it to prevent condensation buildup, which can lead to a soggy crust. Once cooled, place individual slices in an airtight container or tightly wrap them in plastic wrap or aluminum foil.

Refrigerate leftover pizza promptly, ideally within two hours of cooking, to maintain freshness and prevent bacterial growth. Properly stored, leftover pizza can be safely enjoyed for up to 3-4 days. For longer storage, consider freezing – wrap slices individually and store in a freezer-safe bag for up to two months.

Reheat pizza in the oven or toaster oven for best results, restoring some of its original crispness.

Red Baron Pizza Company Information

Discover the story behind your favorite mini pizzas! Red Baron, a trusted name in frozen pizza, consistently delivers quality and convenience to households nationwide.

Company History and Background

Red Baron’s journey began in 1977, born from the innovation of Donatos Pizzeria, a family-owned business in Columbus, Ohio. Initially, the Red Baron line focused on larger, traditional pizzas, quickly gaining popularity for its commitment to quality ingredients and a satisfying taste. Recognizing a growing demand for convenient, smaller portions, the Red Baron Mini Pizza was introduced, becoming a beloved snack and meal option for individuals and families.

Over the decades, Red Baron has remained dedicated to evolving with consumer preferences, continually refining its recipes and expanding its product offerings. The brand is now owned by Schwan’s Company, a leading food manufacturer, allowing for broader distribution and continued investment in innovation. Red Baron’s enduring success stems from its consistent focus on delivering a delicious, affordable, and easy-to-prepare pizza experience.

Other Red Baron Pizza Products

Beyond the beloved Mini Pizza, Red Baron boasts a diverse portfolio catering to various pizza preferences. The Classic Red Baron pizzas are available in numerous sizes and crust styles, including Original, Thin & Crispy, and Pan Crust, offering a traditional pizza experience. For those seeking bolder flavors, Red Baron offers Specialty Pizzas featuring premium toppings like pepperoni, sausage, and supreme vegetable combinations.

Red Baron also provides convenient options like the Big Daddy Pizza, designed for larger gatherings, and frozen pizza rolls for quick snacking. Recently, the brand has expanded into stuffed crust varieties, adding an extra layer of cheesy goodness. Red Baron consistently strives to provide quality and variety, ensuring there’s a pizza option for every craving and occasion, complementing their popular mini pizzas.

Contacting Red Baron Customer Support

Need assistance with your Red Baron Mini Pizzas? Nestlé, the parent company of Red Baron, offers several avenues for customer support. You can reach them through their consumer engagement portal on the Nestlé website, typically featuring FAQs and a contact form for specific inquiries. For immediate assistance, a dedicated phone line is available during business hours, allowing direct communication with a customer service representative.

Social media channels, like Facebook and Twitter, also provide a platform for reaching out with questions or concerns. When contacting support, having the product’s UPC code and purchase date readily available can expedite the process. Red Baron values customer feedback and aims to resolve issues efficiently, ensuring a positive pizza experience for everyone.

tula carrier instructions

Tula Carrier Instructions: A Comprehensive Guide

Welcome! This guide provides detailed instructions for safe and comfortable babywearing with your Tula carrier. Always read all precautions and familiarize yourself with the carrier’s features before first use.

Tula carriers meet EN 13209-2:2006 safety standards, ensuring a secure experience. Proper usage, as outlined in this manual, is crucial for both parent and child.

Understanding Your Tula Carrier

Your Tula carrier is designed for ergonomic comfort and versatility, supporting both you and your baby. It’s crucial to understand its adaptable nature, evolving with your child’s growth. The Tula Explore, for instance, is an all-in-one carrier, offering multiple positions from newborn through toddlerhood.

Before use, take time to identify each component. Familiarize yourself with the adjustable straps, panel width adjustments, and the secure buckle system. These features allow for a customized fit, ensuring optimal support and comfort. Tula carriers comply with European Safety Norm EN 13209-2:2006, demonstrating a commitment to safety standards.

Understanding the carrier’s adjustability is key. The panel can be adjusted in width to accommodate different stages of infant development, and the straps can be modified for various body types. Proper adjustment is vital for maintaining the correct ergonomic ‘M-position’ for your baby, promoting healthy hip development. Always practice assembling and adjusting the carrier before placing your child inside, ensuring a confident and secure experience. Remember, incorrect usage can void the warranty.

Important: Never modify the carrier from its original design.

Safety Precautions & Warnings

WARNING: Always prioritize safety when using your Tula carrier. NEVER leave your child unattended while in or with the carrier. A significant suffocation hazard exists for infants under four months; ensure their face is always visible and unobstructed by the carrier fabric.

Before each use, meticulously inspect the carrier for any signs of damage – tears, loose stitching, or buckle malfunctions. Do not use a damaged carrier. Practice putting on and adjusting the carrier without your baby to ensure a secure and comfortable fit.

Be mindful of your baby’s developmental stage and weight limits for each carry position. Overextending a position or exceeding weight limits compromises safety. Maintain a firm hold of your baby when maneuvering, especially during initial adjustments.

Crucially, read all instructions thoroughly before use. Misuse or failure to follow instructions can lead to falls or injury. Warranty coverage is voided by any use not in accordance with this manual. Always ensure your baby is securely positioned within the carrier, and their airway remains clear.

Remember: Your baby’s safety is paramount.

Carrier Components & Features

The Tula Explore Baby Carrier, an all-in-one design, boasts several key components for optimal comfort and versatility. These include adjustable padded shoulder straps, a supportive waist belt, and a removable drool bib – essential for keeping your carrier clean.

The panel adjusts in width, accommodating growth from newborn to toddler stages. Buckles are strategically placed for easy adjustments and secure fastening. The integrated newborn mode supports infants without requiring an infant insert. The breathable mesh panel ensures airflow, keeping both parent and baby cool.

Key Features: Ergonomic design promotes healthy hip development for your baby. Multiple carry positions – front, hip, and back – offer flexibility as your child grows. The padded waist belt distributes weight evenly, reducing strain on your back and shoulders. The removable hood provides sun protection and privacy.

Familiarize yourself with each component’s function and adjustment mechanisms. Understanding these features will allow you to customize the carrier for the perfect fit and ensure a comfortable experience for both you and your little one.

Explore the possibilities with your Tula!

Preparing for First Use

Before embarking on your babywearing journey with your Tula carrier, thorough preparation is essential. Begin by carefully inspecting the carrier for any manufacturing defects or damage. Ensure all straps, buckles, and seams are intact and secure.

Practice adjusting the carrier before placing your baby inside. Familiarize yourself with the buckle system and how to widen or narrow the panel. Adjust the shoulder straps and waist belt to achieve a comfortable, customized fit. It’s helpful to practice in front of a mirror to visualize the process;

Read the complete instructions, paying close attention to the recommended carry positions and weight/height limits. Understand the proper way to position your baby within the carrier, ensuring their airway remains open and unobstructed.

Consider practicing with a weighted doll or stuffed animal to build confidence. This allows you to master the steps without the added concern of supporting a real baby. Remember, safety is paramount. A well-prepared caregiver is a confident caregiver!

Practice makes perfect – and safe!

Newborn Mode (0-4 Months) ‒ Specific Instructions

When using your Tula carrier with a newborn (0-4 months), utilizing the designated “Newborn Mode” is crucial for optimal support and safety. This mode provides the necessary adjustments to accommodate a smaller infant’s size and developmental needs;

Ensure the panel is in its narrowest setting, utilizing the adjustable inserts if your carrier includes them. These inserts create a snug, secure pocket for your baby, supporting their legs in a healthy “M-position.” Always confirm your baby’s face is visible and their chin is positioned above the carrier panel edge – never pressed against it to avoid suffocation hazards.

Carefully follow the panel height adjustment instructions to ensure proper back support for your newborn. Regularly check your baby’s positioning throughout use. Infants under four months are particularly vulnerable, so never leave your baby unattended while in the carrier.

Important: Constant monitoring and adherence to these specific instructions are vital for safe newborn babywearing.

Front Carry Positions (Inward & Outward Facing)

The Tula carrier offers versatile front carry positions, including both inward (parent-facing) and outward (world-facing) options, catering to your baby’s developmental stage and preferences. For younger infants, the inward-facing position provides crucial closeness and security, promoting bonding and regulating their emotional state;

To achieve a secure inward carry, ensure your baby’s legs are positioned in a healthy “M-position,” with knees higher than their bottom. The carrier panel should be adjusted to provide adequate back support. As your baby grows and gains head control (typically around 5-6 months), you can transition to the outward-facing position.

When outward-facing, ensure your baby is securely positioned and can easily see their surroundings. Regularly check their posture and adjust the carrier as needed. Remember that prolonged outward-facing can be overstimulating for some babies, so observe their cues and alternate positions accordingly.

Hip Carry Position ‒ Detailed Steps

The hip carry position in your Tula carrier is ideal for older babies who have strong head and neck control and enjoy observing the world around them. This position promotes healthy hip development by supporting the “M-position” – knees higher than the bottom.

Step 1: Begin with the carrier already on your body, straps adjusted. Step 2: Gently position your baby on your hip, ensuring their back is supported by the carrier panel. Step 3: Bring the shoulder strap up and over baby’s back, securing it in the buckle.

Step 4: Adjust the panel width to ensure a snug and comfortable fit around your baby. Step 5: Tighten all straps – waist, shoulder, and sternum – for optimal security. Regularly check your baby’s positioning, ensuring their airway remains clear and they are comfortably supported.

Important: Practice in front of a mirror to confirm correct positioning. Ensure baby’s weight is evenly distributed and you maintain a comfortable posture.

Back Carry Position ‒ A Step-by-Step Guide

The back carry position is suitable for older babies with excellent head and neck control, offering comfort for both parent and child during longer periods of carrying. It allows you to maintain a free range of motion while keeping your little one close.

Step 1: Loosen all straps on your Tula carrier. Step 2: Position the carrier on your back, ensuring the panel is at the correct height. Step 3: Carefully lift your baby and gently lower them into the carrier, supporting their back and head.

Step 4: Bring the shoulder straps forward and buckle them securely. Step 5: Tighten the waist belt first, then the shoulder straps, and finally the sternum strap for a snug and secure fit. Regularly check baby’s positioning, ensuring their face is visible and their airway is clear.

Important: It’s recommended to have assistance when first learning the back carry. Practice in front of a mirror to confirm correct positioning and a comfortable fit for both of you.

Adjusting the Carrier for Optimal Fit

Achieving an optimal fit is paramount for both comfort and safety when using your Tula carrier. A properly adjusted carrier distributes weight evenly, minimizing strain on your back and shoulders, while ensuring your baby is securely positioned.

Begin by loosening all straps before placing your baby in the carrier. Once baby is settled, tighten the waist belt first – this is the primary weight-bearing component. Ensure it sits comfortably and snugly around your hips, not your waist.

Next, adjust the shoulder straps to eliminate any slack, bringing the panel closer to your body. Tighten these straps until they feel secure but not overly constricting. Finally, utilize the sternum strap to prevent the shoulder straps from slipping and to further distribute weight.

Remember: Regularly check the fit as your baby grows. Minor adjustments may be needed to maintain optimal comfort and support. A snug fit allows for the “kiss the head” test – you should be able to easily lean forward and kiss your baby’s head without significant space between you and the carrier.

Weight & Height Limits for Each Position

Understanding the weight and height limits for each carry position is crucial for ensuring your baby’s safety and comfort within the Tula carrier. Exceeding these limits can compromise the carrier’s structural integrity and potentially harm your child.

Newborn Mode (0-4 months): Requires the use of the infant insert (sold separately) and is suitable for babies weighing between 7-11 lbs (3.2-5 kg).

Front Carry (Inward & Outward): Suitable for babies weighing between 11-20 lbs (5-9 kg) in the inward-facing position. Outward-facing is appropriate for babies 13-20 lbs (6-9 kg) and who have sufficient head and neck control.

Hip Carry: Recommended for babies weighing between 13-40 lbs (6-18 kg) and with a minimum height of 16 inches.

Back Carry: Designed for babies 18 months and older, or when they have excellent head and neck control, weighing between 20-45 lbs (9-20 kg) and a minimum height of 24 inches.

Always prioritize your baby’s developmental stage and physical capabilities when selecting a carry position.

Cleaning & Maintenance of Your Tula Carrier

Proper cleaning and maintenance are essential to prolong the life of your Tula carrier and ensure a hygienic environment for your baby. Regular care will keep your carrier functioning optimally and looking its best.

Spot Cleaning: For minor spills or stains, gently spot clean the carrier with a mild detergent and damp cloth. Avoid harsh chemicals or bleach, as these can damage the fabric;

Machine Washing: Most Tula carriers are machine washable on a gentle cycle with cold water. Place the carrier in a mesh laundry bag to protect it during washing. Always use a mild, baby-safe detergent.

Drying: Air drying is highly recommended to prevent shrinkage and maintain the carrier’s shape. If using a dryer, select a low heat setting and remove promptly.

Hardware Care: Regularly inspect buckles, straps, and seams for any signs of wear and tear. Clean buckles with a damp cloth. Do not submerge the hardware in water.

Storage: Store your Tula carrier in a cool, dry place away from direct sunlight.

Troubleshooting Common Issues

Encountering difficulties with your Tula carrier? Here’s a guide to resolving some common issues. Always prioritize safety and discontinue use if you’re unsure about any adjustment.

Difficulty with Buckles: If buckles are hard to fasten or unfasten, ensure they are free of debris. A gentle cleaning with a damp cloth can help. Avoid forcing them.

Strap Adjustments: If straps feel loose, double-check that they are properly threaded and tightened. Ensure even weight distribution for optimal comfort.

Carrier Feels Uncomfortable: Adjust the panel width and height to fit your baby’s size and stage. Experiment with different carry positions to find the most comfortable option.

Baby Seems Uncomfortable: Ensure baby’s legs are in a healthy “M” position, with knees higher than their bottom. Check for proper airflow and avoid overheating.

Panel Won’t Adjust: Verify you are using the correct adjustment method for your carrier model. Refer to the detailed instructions for specific guidance.

If issues persist, consult the Tula website or contact customer support for further assistance.

Understanding the EN 13209-2:2006 Safety Standard

Tula Ergonomic Baby Carriers are designed with safety as a top priority, and proudly comply with the European Safety Norm for Soft Carriers, EN 13209-2:2006. This standard sets rigorous testing criteria to ensure baby carriers meet specific safety requirements.

What does this mean for you? It signifies that your Tula carrier has undergone thorough evaluation for structural integrity, material quality, and design safety features. Testing includes assessments of buckles, straps, fabrics, and overall carrier construction.

Key areas covered by the standard include ensuring the carrier can withstand specific loads, that there are no small parts that could pose a choking hazard, and that the carrier’s design supports a safe and ergonomic position for your baby.

Compliance with EN 13209-2:2006 provides assurance that your Tula carrier has been independently verified to meet a recognized safety benchmark. However, always follow the instructions carefully to ensure proper use and maintain safety.

Proper usage, as detailed in this manual, is essential to maximize the safety benefits of your Tula carrier.

Warranty Information & Product Registration

Tula stands behind the quality of its products; We offer a limited warranty against manufacturing defects in materials and workmanship. This warranty covers the original purchaser for a period of one year from the date of purchase.

Warranty coverage does not extend to normal wear and tear, misuse, alterations, or damage resulting from accidents. Specifically, the warranty does not cover any Tula carrier product that is not used in accordance with the instructions outlined in this manual.

To initiate a warranty claim, please contact our customer support team with proof of purchase and a detailed description of the defect. We may request photos or require the product to be returned for inspection.

Product Registration is highly recommended! Registering your Tula carrier allows us to keep you informed about important product updates, safety recalls, and exclusive offers. It also streamlines the warranty claim process if needed.

Register your product easily through our website at [insert website address here]. By registering, you demonstrate your commitment to safe babywearing and help us continue to improve our products.

Resources & Further Learning (Tula Website & Support)

Tula is dedicated to supporting your babywearing journey! Our website, [insert website address here], is a comprehensive resource for all things Tula. You’ll find detailed instructions, frequently asked questions, and helpful videos demonstrating various carrying positions.

Explore our online instruction library for visual guides on how to properly use your Tula carrier, from newborn mode to back carries. We also offer articles on babywearing safety, ergonomic positioning, and choosing the right carrier for your needs.

Need personalized assistance? Our dedicated customer support team is here to help! You can reach us via email at [insert email address here] or through the contact form on our website. We strive to respond to all inquiries promptly and thoroughly.

Join the Tula Community! Connect with other babywearers on our social media channels ([insert social media links here]) to share tips, ask questions, and find inspiration; Learn how to use Tula baby carriers and discover the easy way to babywear!

We are committed to providing you with the resources and support you need to enjoy safe and comfortable babywearing with your Tula carrier.

once by morris gleitzman pdf

Once by Morris Gleitzman PDF: A Comprehensive Article Plan

This article meticulously examines “Once” by Morris Gleitzman, focusing on its PDF availability, historical context, and educational relevance. We’ll explore download legality, reliable sources, and alternative formats like eBooks and audiobooks.

The plan details the novel’s themes, characters, and narrative structure, alongside its reception and potential classroom applications, offering a complete resource for readers and educators.

“Once” by Morris Gleitzman is a profoundly moving and accessible novel, initially published in 2005, that offers a unique perspective on the Holocaust. It’s a story told through the eyes of Felix Salinger, a ten-year-old Jewish boy living in Nazi-occupied Poland in 1942. The book distinguishes itself by avoiding explicit depictions of violence, instead focusing on Felix’s naive understanding of the world around him and his unwavering hope.

The narrative begins with Felix’s relatively sheltered life in an orphanage, blissfully unaware of the horrors unfolding beyond its walls. This innocence is gradually shattered as he embarks on a dangerous journey to find his parents, who were taken by the Nazis. The story’s power lies in its ability to convey the enormity of the Holocaust through a child’s limited, yet poignant, perspective.

The increasing popularity of “Once” has led to a demand for a “Once Morris Gleitzman PDF” version, making it readily available online. However, accessing such files requires careful consideration of legality and ethical implications, which will be discussed later in this comprehensive article.

The Author: Morris Gleitzman

Morris Gleitzman is a celebrated Australian author renowned for his children’s and young adult novels, often tackling complex and sensitive themes with humor and heart. Born in England in 1953, he immigrated to Australia with his family at a young age. Before becoming a full-time writer, Gleitzman worked various jobs, including a scriptwriter for television, which honed his storytelling skills.

He is particularly known for his “Once” series, which began with the publication of “Once” in 2005. Gleitzman’s decision to write about the Holocaust stemmed from a desire to connect with young readers on this important historical event, offering a relatable entry point to a difficult subject. His approach avoids graphic details, focusing instead on the emotional impact through the eyes of a child.

The widespread appeal of “Once” and subsequent books has resulted in numerous requests for a “Once Morris Gleitzman PDF” download. Gleitzman’s commitment to accessible storytelling has made his work a staple in classrooms and libraries worldwide, fostering empathy and understanding among young readers.

Overview of the Novel’s Setting: Nazi-Occupied Poland

“Once” is powerfully situated in Nazi-occupied Poland during the summer of 1942, a period of immense suffering and systematic persecution during World War II. The novel doesn’t explicitly detail the full horrors of the Holocaust, but the oppressive atmosphere and constant threat are palpable throughout Felix’s journey. Poland, at this time, was under brutal German control, with Jewish communities targeted for forced relocation and extermination.

The setting is crucial to understanding the stakes of Felix’s adventure. The landscape itself becomes a character, reflecting the danger and uncertainty faced by those trying to survive. The search for safety leads Felix and Zelda through forests, villages, and towns, each location carrying the weight of occupation and fear.

The demand for a “Once Morris Gleitzman PDF” often stems from educational use, where understanding this historical context is paramount. Gleitzman masterfully portrays the era through a child’s limited perspective, making the setting both accessible and profoundly moving for young readers.

The Core Theme: The Holocaust Through a Child’s Eyes

“Once” uniquely addresses the Holocaust by filtering its horrors through the naive perspective of ten-year-old Felix Salinger. This approach avoids graphic depictions of violence, instead focusing on the emotional impact of loss, fear, and the disruption of a normal childhood. The novel doesn’t shy away from the tragedy, but presents it in a way that is accessible and age-appropriate for younger readers.

The search for a “Once Morris Gleitzman PDF” is often driven by educators seeking resources to introduce this sensitive topic. Gleitzman’s choice to portray the Holocaust through Felix’s eyes allows readers to grapple with the enormity of the event without being overwhelmed by explicit details.

The core theme explores resilience, hope, and the importance of human connection amidst unimaginable cruelty. Felix’s unwavering optimism, despite his circumstances, serves as a powerful testament to the enduring spirit of children affected by war and persecution.

Felix Salinger: The Protagonist

Felix Salinger is the heart of “Once,” a ten-year-old Jewish boy living in Nazi-occupied Poland. He embodies innocence and unwavering optimism, even as his world crumbles around him. Initially, Felix believes his parents are simply away on business, demonstrating a childlike inability to fully grasp the danger he faces.

The availability of a “Once Morris Gleitzman PDF” often sparks discussion about Felix’s character arc. He’s not a typical hero; his strength lies in his persistent hope and his determination to find his parents. His naiveté isn’t presented as weakness, but as a coping mechanism and a source of resilience.

Felix’s journey is one of self-discovery, as he gradually confronts the harsh realities of the Holocaust. He’s a relatable protagonist, prompting readers to empathize with the experiences of children during wartime. His simple questions and observations offer a poignant commentary on the absurdity of hatred and prejudice.

Felix’s Naive Perspective and its Significance

Felix’s remarkably naive perspective is central to the power of “Once,” and frequently discussed when accessing a “Once Morris Gleitzman PDF.” Gleitzman deliberately employs this viewpoint to filter the horrors of the Holocaust through a child’s understanding, making the narrative accessible and profoundly moving.

This isn’t a story about the Holocaust in a traditionally detailed manner; it’s a story experienced through a child who doesn’t fully comprehend its scope. Felix’s questions – like why people are being rounded up – highlight the senselessness of the persecution. His initial belief that his parents are on a business trip shields him, and the reader, from the full weight of the tragedy.

The significance lies in how this naiveté forces readers to confront the events with fresh eyes. It bypasses intellectual understanding and appeals directly to empathy. Gleitzman skillfully uses Felix’s innocence to underscore the loss of childhood and the devastating impact of war, making the story particularly impactful for young readers.

Zelda: A Key Relationship in the Story

Zelda emerges as a pivotal character in “Once,” and her relationship with Felix is frequently analyzed within discussions surrounding the “Once Morris Gleitzman PDF.” After escaping the orphanage, Felix encounters Zelda, a young girl who has been separated from her family. Their connection provides a crucial emotional core to the narrative.

Initially, Felix attempts to “fix” Zelda’s sadness, demonstrating his limited understanding of grief and trauma. However, their bond deepens as they rely on each other for survival, offering companionship and a shared sense of purpose amidst the chaos of Nazi-occupied Poland. Zelda’s quiet resilience complements Felix’s optimistic, yet naive, outlook.

Their dynamic highlights the importance of human connection in the face of adversity. Zelda’s presence forces Felix to confront the reality of the situation, moving beyond his initial denial. She represents the countless children affected by the Holocaust, and their journey together underscores the enduring power of hope and friendship.

The Orphanage and Felix’s Initial Life

Felix’s life before the events of “Once,” as detailed in analyses often found alongside the “Once Morris Gleitzman PDF,” is centered around the orphanage where he lives with numerous other Jewish children. This setting initially provides a semblance of normalcy, shielding him from the full horrors of the war. He believes his parents are still alive and will eventually return for him.

The orphanage, however, is under constant threat, and the looming danger gradually becomes apparent. Felix’s days are filled with simple routines and a naive optimism, fueled by his belief in a happy reunion with his family. He spends his time playing, reading, and generally enjoying a childhood, albeit one overshadowed by uncertainty.

This initial life is crucial for understanding Felix’s character and his subsequent journey. His sheltered upbringing explains his initial lack of awareness regarding the persecution of Jews, and his unwavering hope shapes his actions throughout the novel. The disruption of this life serves as the catalyst for the entire story.

The Journey Begins: Escaping the Orphanage

The pivotal moment initiating Felix’s odyssey, frequently discussed in resources accompanying the “Once Morris Gleitzman PDF,” occurs when the orphanage is raided. This event shatters Felix’s world and forces him to flee with his best friend, Zelda. The raid isn’t explicitly depicted with graphic violence, maintaining the novel’s focus on a child’s perspective.

Their escape is chaotic and driven by instinct, highlighting the suddenness and terror of the situation. Felix, still clinging to the belief his parents are waiting, prioritizes finding them. He and Zelda embark on a perilous journey through Nazi-occupied Poland, relying on their wits and a surprising amount of luck.

This flight marks a dramatic shift in the narrative, transitioning from a relatively sheltered existence to a desperate struggle for survival. The escape from the orphanage isn’t a planned operation, but a reactive response to immediate danger, setting the stage for the challenges and encounters that lie ahead.

The Dangers Faced During the Journey

The “Once Morris Gleitzman PDF” and related analyses consistently emphasize the pervasive dangers Felix and Zelda encounter throughout their travels. These aren’t presented as sensationalized horrors, but rather as a constant undercurrent of threat perceived through Felix’s naive lens. The ever-present risk of discovery by soldiers and collaborators looms large.

Food scarcity is a recurring challenge, forcing them to rely on the kindness of strangers – a kindness that isn’t always forthcoming. They face prejudice and suspicion, navigating a landscape where simply being Jewish puts them in mortal danger. The constant need for concealment and evasion creates immense psychological strain.

Beyond physical threats, the emotional toll of witnessing suffering and loss is significant. Felix’s initial innocence gradually erodes as he confronts the harsh realities of war. The journey is fraught with uncertainty, and each encounter carries the potential for betrayal or capture, making every step a gamble.

Encounters with Various Characters

Discussions surrounding the “Once Morris Gleitzman PDF” frequently highlight the impact of the diverse characters Felix meets during his escape. These encounters, often brief, profoundly shape his understanding of the world and the unfolding horrors around him. He interacts with individuals displaying a spectrum of behaviors – from kindness and compassion to indifference and outright cruelty.

The characters Felix meets aren’t simply plot devices; they represent the complexities of human nature during wartime. He relies on the assistance of farmers, shopkeepers, and even a sympathetic doctor, each interaction offering a glimpse into the moral compromises and acts of bravery occurring amidst the chaos.

These meetings challenge Felix’s naive worldview, forcing him to confront the realities of prejudice and persecution. The encounters with those who actively participate in the persecution are particularly jarring, illustrating the dangers of unchecked hatred. Ultimately, these interactions contribute to Felix’s emotional growth and resilience.

The Role of Hope and Resilience

Analyzing the “Once Morris Gleitzman PDF” reveals a central theme: the enduring power of hope even in the darkest of times. Despite witnessing immense suffering, Felix maintains a remarkable resilience, fueled by his unwavering belief that his parents are still alive. This hope isn’t presented as naive optimism, but as a vital survival mechanism.

Gleitzman masterfully portrays how small acts of kindness and connection can sustain the human spirit. Felix’s relationship with Zelda, in particular, exemplifies this, as they find solace and strength in each other’s company. Their shared vulnerability and determination to survive become a beacon of hope.

The novel demonstrates that resilience isn’t about avoiding pain, but about finding the courage to persevere through it. Felix’s journey is fraught with danger and loss, yet he continues to move forward, driven by his unwavering hope and the bonds he forms along the way. This message resonates deeply with readers.

The Novel’s Genre: Adventure and Historical Fiction

Examining the “Once Morris Gleitzman PDF” highlights its skillful blending of adventure and historical fiction. While rooted in the grim realities of Nazi-occupied Poland during World War II, the narrative unfolds as a compelling journey of survival, firmly placing it within the adventure genre.

The historical backdrop isn’t merely a setting; it’s integral to the plot and character development. Gleitzman meticulously incorporates details of the Holocaust, offering a poignant yet accessible portrayal of this dark period. However, the story is filtered through Felix’s innocent perspective, softening the harshness without diminishing its impact.

The adventure element stems from Felix’s escape from the orphanage and his subsequent quest to find his parents. This journey is filled with peril, unexpected encounters, and moments of both heartbreak and hope. The “Once” PDF reveals a narrative that keeps readers engaged, balancing historical accuracy with thrilling suspense.

Analyzing the Narrative Structure

The “Once Morris Gleitzman PDF” reveals a deceptively simple, yet powerfully effective narrative structure. The story is presented in a largely linear fashion, mirroring Felix’s own unfolding understanding of the world around him. This straightforward approach enhances the impact of the revelations as Felix slowly grasps the gravity of his situation.

Gleitzman employs a chapter-by-chapter structure, each often focusing on a specific encounter or event. This episodic quality builds suspense and maintains reader engagement, propelling the narrative forward at a brisk pace. The PDF format allows for easy navigation through these distinct segments.

The narrative relies heavily on Felix’s first-person perspective, creating a sense of immediacy and intimacy. This limited viewpoint shapes the reader’s understanding, forcing them to piece together the larger picture alongside the protagonist. The structure cleverly utilizes this naiveté to deliver emotional punches.

The Use of Humor in a Serious Context

Examining the “Once Morris Gleitzman PDF” highlights a remarkable narrative technique: the integration of humor within the profoundly serious backdrop of the Holocaust. Gleitzman masterfully employs Felix’s childlike innocence and literal interpretations to create moments of levity, preventing the story from becoming overwhelmingly bleak.

This isn’t frivolous humor, but rather a coping mechanism, reflecting how individuals might find small pockets of joy even amidst unimaginable suffering. Felix’s misunderstandings and quirky observations offer respite for the reader, while simultaneously underscoring his vulnerability.

The PDF allows readers to easily revisit these instances, appreciating the delicate balance Gleitzman achieves. The humor isn’t used to diminish the horrors of the Holocaust, but to humanize the characters and make the story more accessible, particularly for younger audiences. It’s a testament to the author’s skill that he can evoke both laughter and tears.

Symbolism in “Once”

Analyzing the “Once Morris Gleitzman PDF” reveals a rich tapestry of symbolism woven throughout the narrative. The repeated act of running, central to Felix’s journey, symbolizes not only physical escape from persecution but also the desperate search for safety and belonging. The forest itself represents both danger and potential refuge, a liminal space between life and death.

Zelda, as a character, embodies the lost innocence of childhood, and her increasing silence symbolizes the silencing of voices during the Holocaust. The apples, frequently mentioned, can be interpreted as representing a fleeting sense of normalcy and simple pleasures amidst chaos.

The PDF format allows for close reading and annotation, enabling readers to identify and analyze these symbolic elements with greater ease. Gleitzman doesn’t offer explicit interpretations, instead allowing the symbolism to resonate on a deeper, emotional level, enhancing the novel’s enduring power and prompting reflection on its themes.

“Once” as a Historical Resource for Young Readers

The “Once Morris Gleitzman PDF” serves as a powerful, accessible entry point for young readers into the complex history of the Holocaust. Unlike traditional historical accounts, Gleitzman’s novel approaches the subject through the innocent perspective of a child, Felix, making the atrocities more relatable and emotionally resonant for a younger audience.

The book doesn’t shy away from the harsh realities of Nazi-occupied Poland, but it presents them in a way that avoids graphic detail, focusing instead on the impact of events on Felix’s life and relationships. This approach fosters empathy and understanding without overwhelming young readers.

Utilizing the PDF format in educational settings allows for focused study, facilitating discussions about historical context, ethical considerations, and the importance of remembering. “Once” encourages critical thinking and promotes a deeper understanding of this pivotal period in history, making it a valuable resource for classrooms and individual learning.

Educational Value and Classroom Applications

The “Once Morris Gleitzman PDF” offers significant educational value, particularly when integrated into middle school and early high school curricula. Its accessible narrative style and compelling characters make it ideal for fostering discussions about historical fiction, empathy, and the Holocaust.

Classroom applications include exploring themes of prejudice, discrimination, and resilience. Teachers can utilize the novel to introduce concepts of perspective, narrative voice, and the importance of primary and secondary sources. Analyzing Felix’s journey encourages students to consider the human cost of conflict.

The PDF format facilitates close reading exercises, character analysis, and creative writing prompts. Students can research the historical context of the novel, comparing Gleitzman’s portrayal with factual accounts. Furthermore, “Once” promotes critical thinking skills and encourages students to engage with difficult historical topics in a meaningful way, fostering a deeper understanding of the past.

Critical Reception and Awards

“Once” by Morris Gleitzman has garnered widespread critical acclaim for its sensitive and accessible portrayal of the Holocaust through a child’s perspective. Reviewers consistently praise the novel’s ability to engage young readers with a difficult historical subject, balancing gravity with moments of hope and humor.

The book’s success is reflected in its numerous awards and recognitions. It received the Australian Children’s Book of the Year Award for Older Readers in 2011, solidifying its place as a significant work of children’s literature.

The “Once Morris Gleitzman PDF” has further amplified the book’s reach, allowing wider access for educational purposes and independent reading. Critics note Gleitzman’s skillful use of narrative structure and character development, creating a deeply moving and thought-provoking experience for readers of all ages. The novel’s enduring popularity demonstrates its lasting impact and continued relevance.

Finding and Downloading the “Once” PDF

Locating a “Once Morris Gleitzman PDF” requires careful consideration of legality and source reliability. Numerous websites claim to offer free downloads, but many host unauthorized copies, potentially exposing users to malware or violating copyright laws.

A primary search reveals sites like handprinter.org listing the PDF, but users should exercise caution. Legitimate options often involve purchasing the eBook through authorized retailers like Amazon Kindle, Google Play Books, or Apple Books.

Educational institutions may provide access to the PDF through library databases or learning management systems. Always prioritize official sources to ensure a safe and legal download. Be wary of websites promising free PDFs without clear copyright information. Checking for secure HTTPS connections and reading user reviews can also help identify trustworthy platforms. Remember, supporting authors through legal purchases is crucial.

Legality and Ethical Considerations of PDF Downloads

Downloading a “Once Morris Gleitzman PDF” from unauthorized sources raises significant legal and ethical concerns. Copyright law protects the author’s intellectual property, and distributing or obtaining a PDF without permission constitutes copyright infringement. This can lead to legal penalties for both the downloader and the distributor.

Ethically, supporting authors by purchasing their work ensures they can continue creating valuable literature. Free, illegally obtained PDFs deprive authors of their rightful income and undermine the publishing industry. Choosing legal avenues, such as purchasing eBooks or borrowing from libraries, demonstrates respect for the author’s work.

Furthermore, websites offering free PDFs often contain malware or viruses, posing a security risk to your device and personal information. Prioritizing legal and reputable sources safeguards your digital well-being and supports the creative community. Consider the impact of your choices and opt for ethical consumption.

Reliable Sources for Obtaining the PDF

Securing a legitimate “Once Morris Gleitzman PDF” requires utilizing reputable and authorized platforms. Major eBook retailers like Amazon Kindle, Kobo, and Google Play Books offer the novel in PDF format for purchase. These platforms guarantee a safe download experience and ensure the author receives proper compensation.

Online libraries, such as OverDrive and Libby, provide access to eBooks, including “Once,” through library borrowing systems. This is a cost-effective and legal way to read the book digitally. Checking your local library’s digital collection is highly recommended.

Publisher websites, specifically those of publishers handling Morris Gleitzman’s works, may also offer direct PDF purchases. Avoid websites promising free downloads, as these are often illegal and potentially harmful. Always verify the source’s legitimacy before providing any personal or financial information. Prioritize official channels for a secure and ethical reading experience.

Alternative Formats: eBook and Audiobook

Beyond the PDF format, “Once” by Morris Gleitzman is widely available as an eBook, offering enhanced reading experiences on various devices. Platforms like Kindle, Kobo, and Apple Books support multiple eBook formats, allowing readers to adjust font sizes, styles, and background colors for optimal comfort.

For those who prefer listening, an audiobook version of “Once” is readily accessible. Audible, Spotify, and Google Play Books offer the audiobook, narrated to bring Felix’s story to life. Audiobooks are perfect for commutes, exercise, or multitasking.

These alternative formats provide flexibility and accessibility, catering to diverse reading preferences. While a PDF offers a static digital copy, eBooks and audiobooks enhance engagement and convenience. Choosing the right format depends on individual needs and reading habits, ensuring a captivating experience with Gleitzman’s powerful narrative.

Future Books in the Series: “Then,” “Now,” and “Soon”

“Once” is the compelling first installment in a four-book series following Felix Salinger’s journey during the Holocaust. Morris Gleitzman continued Felix’s story with “Then,” exploring his ongoing search for his parents and the escalating dangers he faces.

“Now” further develops the narrative, depicting Felix’s resilience and determination amidst increasingly challenging circumstances. The series culminates with “Soon,” offering a poignant conclusion to Felix’s quest and providing a sense of hope and closure.

Readers captivated by “Once” are encouraged to continue with the subsequent books to fully appreciate the depth and emotional impact of Felix’s story. The series as a whole provides a powerful and accessible introduction to the Holocaust for young readers, emphasizing themes of courage, friendship, and the enduring human spirit. Exploring all four books offers a complete and unforgettable literary experience.

The Lasting Impact of “Once”

“Once” by Morris Gleitzman transcends a simple historical fiction novel; it’s a profoundly moving testament to the resilience of the human spirit during unimaginable hardship. The book’s enduring power lies in its ability to present the Holocaust through the innocent perspective of a child, Felix Salinger, making it accessible and impactful for young readers.

The novel’s success is evidenced by its widespread adoption in educational settings, sparking crucial conversations about history, empathy, and the importance of remembrance. Its availability as a PDF, eBook, and audiobook further expands its reach, ensuring that Felix’s story continues to resonate with new generations.

“Once” doesn’t shy away from the darkness of the Holocaust, but it balances it with moments of hope, humor, and unwavering determination. Ultimately, the book serves as a powerful reminder of the importance of kindness, courage, and the enduring power of the human connection.

PDF

reading medication labels worksheet pdf

Article Plan: Reading Medication Labels Worksheet PDF

This article details resources for functional reading skills, specifically focusing on interpreting medication labels via PDF worksheets. It explores various levels and applications for diverse learners.

Navigating healthcare often requires understanding complex information, and a critical component is deciphering medication labels. These labels aren’t just lists of instructions; they are vital guides to safe and effective treatment. Reading Medication Labels Worksheet PDFs offer a structured approach to mastering this essential life skill.

These resources are designed to bridge the gap between simply reading and truly comprehending the information presented. They move beyond basic literacy, focusing on functional reading – the ability to apply reading skills to real-world situations. Worksheets provide targeted practice, building confidence and reducing the risk of medication errors. This is particularly important for adult learners and individuals with IEPs focused on functional text and life skills.

Understanding the Importance of Medication Label Literacy

Accurate medication use hinges on understanding labels; misinterpretation can lead to serious health consequences, making label literacy a crucial, potentially life-saving skill.

Why Medication Label Reading is a Crucial Life Skill

Navigating healthcare often requires self-management, and medication labels are the primary source of vital information. Understanding dosage, potential side effects, and interactions empowers individuals to take control of their health. Worksheets focusing on these labels build functional reading skills, directly impacting well-being.

Incorrect medication use is a significant public health concern, often stemming from misinterpreting instructions. These worksheets target locating critical details – purpose, amount, frequency – ensuring safe and effective treatment. For adults, especially those managing chronic conditions, this skill is paramount. The ability to decipher these labels isn’t just about reading; it’s about independence and responsible self-care.

Components of a Medication Label

Medication labels contain key elements: active ingredients, dosage, warnings, and expiration dates. Worksheets help students identify and understand each component for safe medication use.

Active Ingredients and Purpose

Understanding active ingredients is fundamental to medication label literacy. Worksheets focusing on this component require students to pinpoint what makes the medicine work. Labels clearly state the active ingredient(s) – the chemical(s) responsible for the therapeutic effect – and the medicine’s intended purpose.

For example, a worksheet might present a label and ask, “What is the active ingredient in this medication?” or “What is this medicine used to treat?” These questions encourage careful reading and information retrieval. Identifying the purpose helps individuals confirm they are using the correct medication for their ailment.

Effective worksheets will utilize realistic label examples, prompting students to differentiate between active and inactive ingredients, solidifying comprehension of this crucial label section.

Dosage Instructions

Accurate dosage is paramount for safe and effective medication use. Worksheets dedicated to dosage instructions challenge students to decipher how much medicine to take and how often. Labels provide specific directions, often including age or weight-based recommendations.

Worksheet questions might ask, “How many milliliters should be taken per dose?” or “How frequently can this medication be administered?” Comprehension extends to understanding terms like “twice daily” or “every 8 hours.”

Realistic scenarios are key; worksheets should present varied dosage forms (tablets, liquids, creams) and require students to interpret instructions accordingly. Mastering this skill prevents underdosing or overdosing, promoting health and well-being.

Warnings and Precautions

Medication labels prominently feature warnings and precautions to ensure patient safety. Worksheets focusing on this section train students to identify potential risks and contraindications. Labels often include “Do Not Use If…” statements, allergy alerts, and interactions with other substances.

Questions might ask, “What should you do if you are pregnant while taking this medication?” or “Are there any foods to avoid?” Understanding these cautions is crucial for preventing adverse reactions.

Worksheets should emphasize the importance of heeding all warnings and consulting a healthcare professional if unsure. Recognizing potential side effects and knowing when to seek medical attention are vital life skills.

Expiration Dates and Storage

Medication labels clearly state expiration dates, crucial for efficacy and safety. Worksheets challenge learners to locate and interpret these dates, understanding that expired medication may be ineffective or harmful.

Storage instructions are equally vital; labels specify temperature requirements (e.g., “Store at room temperature”) and protection from light or moisture. Incorrect storage can degrade the medication.

Worksheet questions might ask, “Can this medication be stored in the bathroom?” or “Is it safe to use after January 2026?” Reinforcing the importance of proper storage ensures medications remain potent and safe for consumption.

Types of Medication Labels & Worksheets

Worksheets cover both over-the-counter (OTC) and prescription labels, differing in detail and required knowledge. Levels vary to suit diverse reading comprehension abilities.

Over-the-Counter (OTC) Medication Labels

OTC medication labels are generally more straightforward, focusing on symptoms treated, dosage for various ages, and common side effects. Worksheets targeting these labels often emphasize basic information retrieval, such as identifying the purpose of the medication or the correct amount to administer;

These exercises are excellent for beginners, building confidence in reading and understanding simple instructions. The focus is on locating key facts directly stated on the label, like active ingredients and warnings. PDF worksheets frequently present realistic OTC label examples, including pain relievers, cold remedies, and allergy medications. Students practice answering questions like “What is this medicine for?” or “How often can I take this?” reinforcing essential life skills.

Prescription Medication Labels

Prescription medication labels present a greater challenge due to more complex terminology and detailed instructions. Worksheets designed for these labels emphasize comprehension and interpretation, requiring students to understand nuanced directions and potential drug interactions.

These resources often include questions about refill information, the prescribing doctor’s details, and specific warnings related to individual health conditions. PDF worksheets utilize realistic prescription label examples, prompting learners to identify crucial details like dosage schedules and potential side effects. Students practice interpreting abbreviations and understanding the importance of following instructions precisely. This builds critical thinking skills and promotes medication safety.

Worksheet Level 1: Basic Information Retrieval

Level 1 worksheets focus on foundational skills, directly extracting information from the medication label itself. Questions are straightforward, prompting students to locate answers explicitly stated on the label. Examples include identifying the medicine’s purpose, who should (or shouldn’t) take it, and the prescribed dosage.

These exercises build confidence and reinforce the concept that the label is the primary source of information. Worksheets utilize simple questioning techniques, like “What is this medicine for?” or “How much medicine should you take?”. This level emphasizes locating facts and understanding basic terminology, preparing students for more complex comprehension tasks.

Worksheet Level 2: Comprehension and Interpretation

Level 2 worksheets move beyond simple retrieval, demanding students interpret the information presented on medication labels. Questions require applying knowledge and drawing conclusions, rather than direct copying. Scenarios might ask, “What should you do if you miss a dose?” or “Can this medicine be taken with other medications?”.

These exercises assess understanding of warnings and precautions, and the ability to synthesize information. Students practice functional reading skills, crucial for real-life medication management. Worksheets often include multiple-choice questions or short-answer prompts, fostering critical thinking and problem-solving abilities.

Using Reading Medication Labels Worksheets

These worksheets effectively target functional reading, supporting IEP goals related to life skills and functional text comprehension for various learners and abilities.

Targeting Functional Reading Skills

Reading medication labels presents a real-world application of functional reading, moving beyond simple decoding to practical comprehension. These worksheets directly address this need, requiring students to locate specific information – dosage, purpose, warnings – within the text.

Level 1 worksheets emphasize basic information retrieval, prompting students to find answers directly stated on the label. Level 2 builds upon this, demanding interpretation and understanding of the information’s implications. This progression fosters critical thinking and the ability to apply knowledge to personal health decisions.

The focus isn’t just reading the words, but understanding what those words mean in a health context, a vital skill for independent living and well-being.

Supporting IEP Objectives (Functional Text & Life Skills)

These reading medication label worksheets are ideally suited for supporting Individualized Education Program (IEP) objectives, particularly those focused on functional text and essential life skills. They provide measurable data points for tracking student progress in real-world application of reading comprehension.

Worksheets directly address goals related to health literacy, independent living, and safety. They offer opportunities to assess a student’s ability to access and interpret crucial information found on everyday packaging.

The no-prep format simplifies implementation for educators, allowing for focused instruction and assessment. Units 1, 2, and 3 offer a progressive skill-building approach, catering to diverse learning needs within an IEP framework.

Adult Learner Applications

Reading medication labels is a vital skill for independent living, making these worksheets exceptionally valuable for adult learners. They are particularly beneficial for individuals navigating healthcare systems, managing chronic conditions, or transitioning to greater self-sufficiency.

The realistic medicine label examples within the units provide practical, relevant practice. Worksheets can be integrated into adult education programs, ESL classes, or vocational training initiatives.

Focusing on comprehension and interpretation empowers learners to make informed decisions about their health. These resources bridge the gap between classroom learning and real-world application, fostering confidence and promoting well-being.

Resources and Availability (PDF Worksheets)

Numerous free and comprehensive PDF worksheet options are available online, alongside full unit resources (Units 1, 2, and 3) for in-depth practice.

Free Worksheet Options

Many educators and organizations offer freely accessible reading medication labels worksheets in PDF format. These resources are invaluable for introducing the core concepts of label interpretation without financial commitment. Typically, these free options include a selection of common over-the-counter medication labels, designed for basic information retrieval practice.

These introductory worksheets often focus on Level 1 skills, prompting students to locate specific details directly stated on the label – such as the medicine’s purpose, appropriate users, dosage amounts, and frequency of administration.

While the scope might be limited compared to paid units, these free worksheets provide a solid foundation for building comprehension and fostering essential health literacy skills. They are excellent starting points for individual practice or small group activities.

Full Unit Resources (Units 1, 2, 3)

For a more comprehensive approach to medication label literacy, complete unit resources are available, often structured into three progressive levels. These units, like those created by Karin Falconer, expand beyond basic information retrieval to encompass deeper comprehension and practical application.

Unit 1 typically introduces foundational skills, while Unit 2 builds upon this with more complex label examples and interpretation tasks. Unit 3 often challenges learners with real-world scenarios, requiring them to apply their knowledge to make informed decisions about medication use.

These full units feature 19 pages of realistic examples, targeting functional reading and encompassing both prescription and over-the-counter medications, offering extensive practice.

Benefits of Practice with Worksheets

Worksheet practice significantly improves comprehension of crucial health information, enhancing a learner’s ability to safely manage medications and promote overall well-being.

Improving Comprehension Skills

Reading medication labels requires focused attention to detail and the ability to extract key information. Worksheets designed around this skill actively build comprehension by prompting learners to locate specific facts – such as dosage, purpose, and warnings – directly from the label text.

This process isn’t simply about finding answers; it’s about developing the ability to interpret what those answers mean. Level 1 worksheets emphasize basic information retrieval, while Level 2 challenges students with deeper comprehension and application.

Consistent practice with these worksheets strengthens functional reading skills, enabling individuals to confidently navigate real-world healthcare scenarios and make informed decisions about their health. The realistic examples provided within the 19-page resource offer ample opportunity for skill reinforcement.

Enhancing Health and Well-being

Accurate medication management is fundamental to maintaining good health, and understanding medication labels is paramount. These worksheets empower individuals to take control of their healthcare by fostering the ability to correctly interpret crucial information.

Misunderstanding dosage instructions or ignoring warnings can have serious consequences; therefore, these resources directly contribute to patient safety and well-being.

By practicing with realistic over-the-counter and prescription label examples, learners develop a vital life skill that promotes responsible self-care and reduces the risk of medication errors. This skill is particularly valuable for adult learners and those with IEP objectives focused on functional life skills.

Medication label literacy, reinforced by these worksheets, is a lasting skill. It empowers informed healthcare decisions and promotes safety for a healthier, more independent life.

The Long-Term Value of Medication Label Literacy

Beyond immediate safety, mastering medication label reading cultivates a proactive approach to personal health management. Consistent practice with worksheets builds confidence in understanding crucial details – dosage, potential interactions, and side effects. This skill isn’t static; it evolves with each label encountered, fostering lifelong learning.

Individuals equipped with this literacy are better advocates for their own well-being, capable of engaging in informed discussions with healthcare providers. They can independently verify instructions, reducing the risk of errors and improving treatment adherence. Ultimately, these worksheets contribute to greater independence and a higher quality of life, empowering individuals to take control of their health journey.

skytech 1001a manual

Skytech 1001A Manual: A Comprehensive Guide

Welcome! This guide provides detailed instructions for your Skytech 1001A remote, covering setup, operation, troubleshooting, and advanced features for optimal fireplace control and gaming experiences.

Skytech Gaming delivers exceptional gaming PCs, and SignalRGB offers unified RGB customization, enhancing your setup with cutting-edge technology and sleek designs;

The Skytech 1001A remote is designed for convenient control of your gas fireplace, offering a user-friendly experience. This remote allows for effortless adjustments to flame height and heat output, enhancing comfort and ambiance within your home. It’s a crucial component for modern gas fireplace systems, providing a streamlined alternative to manual operation.

Understanding the remote’s capabilities is key to maximizing its benefits. The LOCK-OUT function, for instance, prevents accidental manual operation of the transmitter while allowing automatic thermostat functions to continue uninterrupted. This feature ensures safety and prevents unwanted adjustments.

Furthermore, the Skytech 1001A integrates seamlessly with Skytech Gaming’s ecosystem, particularly through SignalRGB, offering potential for unified control and customization. This remote isn’t just about fireplace control; it’s a gateway to a connected and personalized home environment.

What is the Skytech 1001A Used For?

The Skytech 1001A remote primarily serves as a wireless control system for gas fireplaces. It eliminates the need to physically adjust settings on the fireplace itself, offering convenience and ease of use. Users can effortlessly manage flame levels, heat output, and potentially other features depending on fireplace compatibility.

Beyond basic control, the remote’s LOCK-OUT function is a key safety feature, preventing unintended operation of the transmitter while maintaining automatic functions like thermostat control. This is particularly useful in households with children or pets.

Importantly, the Skytech 1001A is part of a broader Skytech ecosystem, connecting to features like SignalRGB for potential integration with gaming setups and smart home environments. It’s designed to enhance not only fireplace operation but also the overall user experience within a modern, connected home.

Understanding the Remote’s Features

Explore key functionalities! The Skytech 1001A boasts transmitter operation, a lock-out feature, gas fireplace compatibility, and seamless SignalRGB integration for enhanced control.

Transmitter Operation and Lock-Out Function

Understanding Control: The Skytech 1001A remote’s transmitter function allows convenient operation of your gas fireplace. Engaging the LOCK-OUT feature specifically prevents manual operation via the transmitter itself, ensuring safety and preventing unintended adjustments.

Auto Mode Continuity: Importantly, activating the LOCK-OUT does not disable automatic functions. If your fireplace is set to operate in auto modes – such as thermostat control – those features will continue to function normally, maintaining a consistent temperature.

Total Lock-Out: To completely disable all transmitter signals, including those from auto modes, the transmitter’s MODE setting must be adjusted. This provides a comprehensive lock-out, preventing any operational commands from being sent. This SKYTECH remote offers robust control and safety features.

Compatibility with Gas Fireplaces

Universal Control: The Skytech 1001A remote is designed for broad compatibility with a wide range of gas fireplaces. However, confirming compatibility with your specific fireplace model is crucial for optimal performance. Complete instructions are available for installing the SKY-1001-A remote control, ensuring a seamless integration process.

Troubleshooting Resources: Skytech provides comprehensive troubleshooting instructions for various series – 1000, 1400, 3300, 5000, and 5300 – to address potential compatibility issues or operational challenges. These resources are readily accessible online, offering step-by-step guidance.

Installation Support: Detailed installation guides are available to assist you in properly connecting the remote to your gas fireplace. Proper installation is key to unlocking the full functionality and benefits of the Skytech 1001A remote control system.

SignalRGB Integration and Control

Unified RGB Control: SignalRGB, developed by Skytech Gaming, provides a centralized platform for controlling RGB-enabled devices within your gaming setup. This integration extends beyond the fireplace remote, offering a cohesive aesthetic experience across all compatible components.

Seamless Synchronization: SignalRGB allows for seamless synchronization of lighting effects, enabling you to create dynamic and immersive gaming environments. Customize colors, patterns, and brightness levels to match your preferences and game themes.

Enhanced Gaming Experience: By unifying RGB control, SignalRGB enhances the overall gaming experience, adding a layer of personalization and visual appeal. Explore the software’s features to unlock the full potential of your RGB-enabled devices and create a truly unique setup.

Setting Up Your Skytech 1001A

Begin with ease! This section details initial pairing, battery installation, and understanding the remote’s various modes for seamless fireplace and system control;

Initial Setup and Pairing

Getting Started: The initial setup of your Skytech 1001A remote is straightforward, ensuring a quick and easy connection to your gas fireplace system. Begin by ensuring your fireplace receiver is compatible with the Skytech remote control series.

Pairing Process: Typically, the remote comes pre-paired, but if needed, consult your fireplace’s specific manual for pairing instructions. This often involves entering a pairing mode on the receiver and then pressing a designated button on the Skytech 1001A remote.

Successful Connection: A successful pairing is usually indicated by a confirmation signal or a change in the receiver’s display. If pairing fails, try again, ensuring no other interfering signals are present. Remember, engaging the LOCK-OUT function only affects manual transmitter operation, not automatic thermostat functions.

Skytech Gaming Integration: As a new Skytech Gaming Desktop PC owner, you’re embarking on an unparalleled gaming adventure, and this remote enhances that experience.

Battery Installation and Replacement

Powering Your Remote: Maintaining optimal battery power is crucial for consistent Skytech 1001A performance. This remote typically requires standard batteries – check the battery compartment for the correct type and quantity.

Installation Procedure: Carefully open the battery compartment, usually located on the back of the remote. Insert the batteries, ensuring correct polarity (+ and -) as indicated inside the compartment. Close the compartment securely.

Replacement Indicators: A weak signal or unresponsive buttons indicate low battery levels. Replace batteries promptly to avoid interruptions. Skytech Gaming prioritizes quality, and reliable power is essential for a seamless experience.

Proper Disposal: Dispose of used batteries responsibly, following local regulations for battery recycling. SignalRGB by Skytech Gaming offers unified control, but requires sufficient battery power to function correctly.

Understanding the Remote’s Modes

Operational Versatility: The Skytech 1001A remote features distinct operational modes designed for flexible fireplace control. Understanding these modes is key to maximizing functionality and tailoring the experience to your preferences.

Auto Modes Explained: Auto modes utilize the built-in thermostat for automated temperature regulation. These modes maintain a consistent comfort level without manual adjustments. Engaging the LOCK-OUT function prevents manual transmitter operation while auto modes remain active.

Manual Mode Details: Manual mode allows direct control over flame height and other fireplace settings. This provides immediate adjustments for personalized ambiance. The transmitter’s MODE must be considered for total lock-out of operating signals.

Thermostat Operation: The remote’s thermostat function ensures efficient heating and energy conservation. Skytech Gaming prioritizes user experience, and these modes offer convenience and control.

Troubleshooting Common Issues

Resolving Problems: This section details solutions for common Skytech 1001A remote issues, including unresponsive remotes, signal interference, and lock-out function malfunctions, ensuring smooth operation.

Remote Not Responding

Troubleshooting a Non-Responsive Remote: If your Skytech 1001A remote isn’t responding, begin with the simplest checks. First, verify the batteries are correctly installed and have sufficient charge; replace them with fresh batteries if needed. Ensure there are no obstructions between the remote and the fireplace receiver unit.

Next, confirm the receiver is powered on and functioning correctly. Check the fireplace’s control panel for any error messages or indicators. If the remote still fails to operate, attempt a reset of the receiver by briefly disconnecting its power source.

Remember that engaging the LOCK-OUT function prevents manual transmitter operation, but auto modes should continue functioning. If the issue persists, consult the complete troubleshooting instructions available online for Skytech 1000, 1400, 3300, 5000, and 5300 series remotes for further assistance.

Signal Interference and Range

Understanding Signal Limitations: The Skytech 1001A remote utilizes radio frequency (RF) signals, which can be susceptible to interference. Common sources include other electronic devices, metal objects, and certain types of building materials. To optimize performance, minimize obstructions between the remote and the fireplace receiver.

The operational range of the remote is dependent on environmental factors. While generally effective within a reasonable distance, excessive range or significant obstructions can weaken the signal. If experiencing intermittent connectivity, try moving closer to the fireplace or repositioning the receiver to reduce interference.

Ensure the receiver’s antenna is properly connected and unobstructed. Remember that the LOCK-OUT function doesn’t affect the receiver’s ability to receive signals in auto modes. For detailed troubleshooting, refer to the complete instructions for Skytech fireplace remote controls online.

Lock-Out Function Malfunction

Addressing Lock-Out Issues: If the Skytech 1001A’s lock-out function appears to be malfunctioning – either failing to engage or preventing all operation – several steps can be taken to resolve the issue. First, confirm you are attempting to engage the lock-out correctly, as it only disables manual transmitter operation, not automatic functions like thermostat control.

If the remote is completely unresponsive after engaging lock-out, check the batteries and ensure they are correctly installed. A low battery can sometimes cause erratic behavior. Verify the transmitter’s MODE is set appropriately; total lock-out requires specific settings.

For persistent problems, consult the complete troubleshooting instructions available online for Skytech 1000, 1400, 3300, 5000, and 5300 series remotes. Skytech Gaming support can also provide assistance with complex issues.

Skytech Gaming Desktop PCs & Support

Explore Skytech Gaming! Discover high-performance, reliable PCs built by passionate gamers, offering exceptional experiences with cutting-edge technology and sleek designs for all users.

Skytech Gaming: Quick Start Guide

Congratulations on your new Skytech Gaming Desktop PC! You’re now ready to embark on an unparalleled gaming adventure. This quick start guide will help you get up and running swiftly, ensuring a seamless and enjoyable experience from the moment you power on your new system.

Skytech Gaming takes immense pride in the meticulous care and quality infused into every PC we build. Each gaming PC begins with a carefully considered budget, followed by the hand-selection of every component. Rigorous testing is then performed to guarantee optimal performance and stability.

We are dedicated to creating high-performance, reliable, and stylish gaming PCs. Built by passionate gamers, for passionate gamers, we deliver an exceptional gaming experience. Don’t forget to explore SignalRGB for unified RGB control, enhancing your setup with seamless synchronization and customization!

Contacting Skytech Gaming Support

Need assistance with your Skytech Gaming PC or have questions regarding your Skytech 1001A remote? Our dedicated support team is here to help! We understand that sometimes you may require assistance, and we are committed to providing prompt and effective solutions to ensure your complete satisfaction.

For order inquiries, sales-related questions, or technical support, Skytech Gaming offers multiple convenient channels to reach us. You can connect with our team via Live Chat directly on our website for immediate assistance. Alternatively, you can reach us by Phone at 1-888-370-8882 during our business hours.

For more detailed inquiries or if you prefer written communication, please submit your request through our Email Support at support@skytechgaming.com. We strive to respond to all inquiries as quickly as possible.

Prebuilt vs. Custom Gaming PCs

Choosing the right gaming PC can be daunting! Skytech Gaming offers both prebuilt and custom-built options to cater to diverse needs and budgets. Prebuilt PCs provide a convenient, ready-to-play experience, meticulously assembled and rigorously tested for optimal performance and reliability. These systems are ideal for gamers seeking a hassle-free setup with guaranteed compatibility.

However, for those desiring complete control over every component, custom PCs are the way to go. Skytech Gaming allows you to hand-pick each part, tailoring the system to your specific gaming preferences and future upgrade plans. This approach ensures maximum performance and personalization, reflecting your unique gaming style.

Skytech Gaming prides itself on quality, regardless of whether you choose a prebuilt or custom configuration, delivering high-performance machines built by passionate gamers.

Advanced Features & Customization

Unlock your system’s potential! Explore SignalRGB for unified RGB control, optimize gaming performance through component understanding, and personalize your Skytech experience fully.

RGB Customization with SignalRGB

Elevate your gaming aesthetic with SignalRGB by Skytech Gaming, a powerful tool for unified RGB control. This software allows seamless synchronization and customization of all your RGB-enabled devices, creating an immersive and visually stunning gaming environment.

SignalRGB goes beyond simple color changes; it offers dynamic effects, profiles, and integrations with popular games. Customize lighting to react to in-game events, music, or system temperatures. Explore a vast library of community-created profiles or design your own unique lighting schemes.

The intuitive interface makes it easy to manage and control all your RGB components from a single application. Skytech Gaming prioritizes delivering an exceptional gaming experience, and SignalRGB is a key component of that commitment, providing unparalleled personalization and visual flair. Enjoy a truly customized and captivating gaming setup!

Optimizing Performance for Gaming

Maximize your gaming experience with a Skytech Gaming Desktop PC, meticulously built for high-performance and reliability. Skytech Gaming hand-picks every component, testing for optimal performance within a defined budget, ensuring a balanced and powerful system.

Regularly update your graphics drivers for the latest performance enhancements and bug fixes. Close unnecessary background applications to free up system resources. Monitor system temperatures to prevent thermal throttling, which can reduce performance. Consider upgrading components like RAM or storage for a noticeable boost.

Skytech Gaming creates PCs designed for gaming, streaming, and content creation. Explore prebuilt options or customize your own build to meet your specific needs. A well-optimized system delivers smooth frame rates, reduced latency, and an immersive gaming experience.

Understanding Component Selection

Skytech Gaming excels in carefully selecting components for their prebuilt and custom PCs, prioritizing quality and performance. Each part is hand-picked to ensure compatibility and deliver an exceptional gaming experience. The CPU, GPU, RAM, and storage are chosen based on the intended use and budget.

Consider the resolution and refresh rate of your monitor when selecting a graphics card. Faster RAM speeds can improve performance in CPU-intensive games. An NVMe SSD provides significantly faster loading times compared to a traditional hard drive. Power supply wattage must be sufficient to handle all components with headroom for future upgrades.

Skytech Gaming offers expert guidance in component selection, helping you build a PC tailored to your specific gaming needs. They focus on creating high-performance, reliable, and stylish gaming PCs.

cata enchanting guide

Cataclysm Classic Enchanting Guide: Leveling 1-525

Today, December 13th, 2025, this guide details leveling Enchanting 1-525 in Cataclysm Classic, covering material gathering, recipes, and profitable sales strategies for players.

Enchanting in Cataclysm Classic allows players to imbue gear with powerful bonuses, significantly enhancing character performance. This profession utilizes materials gathered from various sources – herbs, ores, and items obtained through quests and dungeons. Mastering enchanting requires understanding material costs, recipe availability, and market demands in cities like Portsmouth, Roanoke, and Charlotte. Successful enchanters can generate substantial gold through crafting and auction house sales, adapting to fluctuating prices and player needs throughout the expansion.

Gathering Materials for Enchanting

Enchanting relies heavily on consistent material acquisition. Herb gathering in zones around Alamo, Texas, and Portland, Oregon, provides essential botanicals. Mining yields ores crucial for crafting enchanting reagents. Disenchanting unwanted items – greens, blues, and epics – yields valuable materials. Efficient gathering, combined with understanding regional price variations, like those seen in Roanoke, is key to maximizing profits and minimizing enchanting costs.

Herb Gathering Locations

Prime herb locations are scattered across Cataclysm zones. Focusing on areas near Portsmouth, New Hampshire, and Charlotte, North Carolina, yields plentiful herbs like Ghost Mushroom and Golden Sansam. Utilize online databases to pinpoint specific herb spawns. Remember that competition can be fierce; scouting less-populated zones, like those around Roanoke, Virginia, can prove fruitful for dedicated gatherers.

Mining for Enchanting Materials

Essential enchanting materials often require mining. Rich Adamantite and Titanium veins are crucial, found abundantly near Portland, Oregon, and Alamo, Texas. Cobalt ore is also valuable, though less common. Utilize mining routes optimized for efficiency, and consider using tracking addons. Be mindful of competition; less-populated areas, like Roanoke, Virginia, may offer better yields.

Enchanting Leveling 1-75: Early Game

Begin your enchanting journey by focusing on readily available materials. Disenchanting green items is the primary method for gaining initial experience. Prioritize quests offering enchanting rewards or materials. Early recipes are inexpensive, allowing for consistent leveling. Avoid costly materials; efficiency is key at this stage. Portsmouth, New Hampshire, offers a stable economy.

Disenchanting Green Items

Green items are your workhorse for levels 1-75. Farm dungeons and quest rewards for plentiful, low-cost gear. Disenchanting yields Lesser Eternal Essences and Small Radiant Shards – essential for early recipes. Roanoke, Virginia, provides affordable housing, freeing up gold for enchanting supplies. Prioritize quantity over quality; consistent disenchanting is vital.

Focusing on Low-Level Recipes

Initially, concentrate on readily available, inexpensive recipes. Brush of Speed and Minor Strength are excellent choices, utilizing the shards from green item disenchanting. Portland, Oregon’s higher cost of living necessitates efficient leveling. Avoid complex enchants requiring rare materials early on; focus on volume. Consistent crafting builds skill quickly and efficiently.

Enchanting Leveling 75-150: Mid-Game

Transitioning to blue item disenchanting is key. Greater Chestplate of Stamina and similar recipes become viable. Utilize daily quests, particularly those offering enchanting materials, like herbs from Portsmouth, New Hampshire. Roanoke, Virginia’s lower costs allow for experimentation. Prioritize recipes with a good return on investment, balancing skill gain with profit potential.

Disenchanting Blue Items

Blue quality items yield more substantial enchanting materials. Focus on dismantling items found in dungeons or purchased via the Auction House, considering Charlotte, North Carolina’s market. Disenchanting provides Large Brilliant Shards and Lesser Eternal Shards, crucial for higher-level enchanting. Efficiently managing your inventory and material costs is paramount for maximizing profits during this phase.

Utilizing Daily Quests for Materials

Daily quests offer a consistent source of enchanting materials. Specifically, quests in Roanoke, Virginia, can reward items suitable for disenchanting. Prioritize quests that guarantee blue or even green items, maximizing shard acquisition. Supplementing your income with daily quests ensures a steady flow of materials, reducing reliance on expensive Auction House purchases.

Enchanting Leveling 150-225: Expanding Skills

This phase introduces more complex enchanting techniques. Begin learning Gem Cutting, crucial for enhancing gear. Simultaneously, disenchanting Epic items from quests in cities like Charlotte, North Carolina, yields valuable materials. Focus on recipes requiring these materials, boosting skill points and preparing for specialization. Efficiently manage costs and explore market trends.

Gem Cutting significantly enhances enchanting potential. Located in major cities like Portland, Oregon, this discipline allows socketing gear with gems, adding powerful stats. Initially, focus on Prospecting ores from Roanoke, Virginia, to acquire basic gems. Learning cuts unlocks new enchantments and boosts resale value, creating profitable opportunities for dedicated enchanters.

Crafting and Disenchanting Epic Items

Epic items, sourced from challenging content, are crucial for enchanting progression. Disenchanting them yields substantial enchanting materials, accelerating skill gains beyond blue items. While costly to acquire – consider housing prices in Charlotte, North Carolina – the returns are significant. Prioritize efficient disenchanting to maximize material output and level gains.

Enchanting Leveling 225-300: Specialization Begins

Reaching 225 unlocks specialization, demanding focused enchanting. Choose weapon, armor, or ring/neck enchantments based on market demand – observe trends like those in Portland, Oregon. Prioritize recipes within your chosen specialization for faster leveling. Simultaneously, explore profitable enchanting sales, capitalizing on player needs and maximizing gold income.

Focusing on Specific Enchant Types (Weapon, Armor, etc.)

Concentrate on a single enchanting path for efficiency. Weapon enchants often yield higher profits, mirroring housing costs in Charlotte, North Carolina. Armor enchants provide consistent demand. Analyze auction house data – like Portsmouth, New Hampshire – to identify gaps and maximize returns. Specialization accelerates leveling and boosts profitability.

Profiting from Enchanting Sales

Maximize profits by understanding market trends. Roanoke, Virginia’s cost of living suggests lower competition; apply this to enchanting. Monitor auction house prices – similar to Portland, Oregon – for optimal listing times. Capitalize on demand for specific enchants, mirroring housing market fluctuations. Consistent sales build reputation and increase revenue streams.

Enchanting Leveling 300-375: Rare Materials

This range demands Primal Might, Life, and Water. Sourcing these, like finding affordable housing in Charlotte, North Carolina, requires dedication. Daily quests and efficient farming are crucial. Utilize auction house knowledge – akin to Portsmouth, New Hampshire – to buy low and sell high. Mastering this phase unlocks higher-tier enchantments.

Sourcing Primal Might/Life/Water

Primals drop from specific Cataclysm zones and bosses. Like Roanoke, Virginia’s housing market, consistency is key. Focus on areas with high mob density. Daily quests offer guaranteed rewards, mirroring Portland, Oregon’s diverse options. Disenchanting epic gems also yields primals, though less reliably. Efficient farming requires knowledge and patience, similar to Alamo, Texas.

Crafting High-Demand Enchants

Focus on enchants popular with raiders and PvP players. Like Portsmouth, New Hampshire’s housing costs, demand dictates price. Weapon enchants offering critical strike or haste are consistently valuable. Armor enchants boosting stamina or resilience also sell well. Monitor the Auction House – Charlotte, North Carolina’s market – to identify profitable niches.

Enchanting Leveling 375-450: Heroic Enchantments

Reach 375 and begin disenchanting Heroic-level items. These yield valuable materials like Volatile Life/Might/Water, crucial for powerful enchants. Roanoke, Virginia’s lower cost of living mirrors efficient material sourcing. Mastering gem inlays alongside enchanting boosts profits. Focus on enchants sought after by end-game players, mirroring Portland, Oregon’s demand.

Disenchanting Heroic Items

Heroic items are key to 375-450 leveling. Disenchanting them yields Volatile materials – Life, Might, and Water – essential for crafting high-demand enchants. Like Charlotte, North Carolina’s housing market, demand dictates value. Prioritize items with multiple volatile shards, maximizing your enchanting gains and profitability, mirroring Portsmouth’s detailed profiles.

Mastering Gem Inlays

Gem inlays become crucial at 450-525. Like Roanoke’s cost of living, understanding value is key. Mastering meta gem sockets and cuts significantly boosts item power, driving demand. Utilize Volatile materials obtained from Heroic items, similar to Alamo, Texas’s detailed profile, to craft and sell these powerful enhancements for substantial profits.

Enchanting Leveling 450-525: End-Game Mastery

Reaching 450-525 focuses on volatile materials and meta gems. Like Portland, Oregon’s housing market, demand dictates profit. Disenchanting Heroic items yields these crucial components. Mastering gem inlays, mirroring Charlotte, North Carolina’s diverse housing options, maximizes item power and sale value, establishing true enchanting expertise.

Utilizing Volatile Materials

Volatile materials, like those found in Roanoke, Virginia, are essential at this level. They’re obtained from Heroic dungeons and raids, mirroring the varied housing costs there. These materials power the most potent enchants, demanding careful sourcing and efficient disenchanting to maximize profits and crafting potential.

Crafting and Selling Meta Gems

Meta gems, like properties in Portland, Oregon, represent peak enchanting value. Mastering their creation requires volatile materials and precise gem cutting. Successfully crafting and auctioning these gems—reflecting Charlotte, NC’s market—yields substantial gold, demanding astute market analysis and competitive pricing strategies for maximum profitability.

Maximizing Enchanting Profits

Like Portsmouth, NH housing, enchanting profits hinge on understanding demand. Auction House mastery is crucial; monitor prices, undercut strategically, and capitalize on peak times. Analyzing regional economies—similar to Roanoke, VA’s cost of living—identifies lucrative enchantments. Consistent monitoring and adaptation are key to sustained profitability in the Cataclysm Classic market.

Auction House Strategies

Mirroring Charlotte, NC’s housing market, the Auction House requires diligent observation. Utilize addons to track price fluctuations and identify undercutting opportunities. Consider listing in stacks to attract buyers, and relist strategically during peak hours. Patience is vital; avoid panic selling, and learn to recognize profitable trends, like Alamo, TX profiles.

Understanding Market Demand

Like Portsmouth, NH’s cost of living, demand shifts constantly. High-population realms typically exhibit greater demand for popular enchants. Monitor raid progression; heroic enchants surge in value during progression. Analyze server economies – Roanoke, VA’s rent reflects local needs. Adapt your crafting to fulfill current desires, maximizing profits.

Essential Enchanting Addons

Similar to tracking housing prices in Charlotte, NC, addons streamline enchanting. Recipe tracking addons display available recipes and missing materials. Material cost calculators, like those for Portland, OR, determine profitability. Auctioneer or TradeSkillMaster help analyze market trends. These tools are vital for efficient leveling and maximizing profits, mirroring Alamo, TX’s data.

Recipe Tracking Addons

Much like monitoring Roanoke, VA’s housing market, these addons are crucial. They display all learnable enchanting recipes, highlighting those you already know. More importantly, they clearly show missing materials needed for crafting. This prevents wasted time and gold searching for components, optimizing your enchanting progression and efficiency significantly.

Material Cost Calculators

Similar to analyzing Charlotte, NC’s rental costs, these addons calculate the exact gold cost of enchanting materials. They pull current Auction House prices, showing potential profit margins before crafting. This is vital for maximizing earnings, especially when dealing with volatile materials, ensuring you don’t lose gold on enchantments.

Troubleshooting Common Enchanting Issues

Like understanding Roanoke, VA’s housing market fluctuations, enchanting can present challenges. Disenchanting failures happen, though rare; ensure sufficient skill level. Managing material costs, mirroring Portland, OR’s high living expenses, requires Auction House vigilance. Track prices and adjust crafting based on demand to avoid losses.

Dealing with Disenchanting Failures

Similar to navigating Charlotte, NC’s diverse housing options, occasional disenchanting failures are inevitable. While infrequent in Cataclysm Classic, a lower Enchanting skill increases the chance. Don’t panic! It’s not a complete loss; continue leveling and revisit the item later with a higher skill level for success.

Managing Material Costs

Just as Portsmouth, NH, presents a high cost of living, enchanting materials can be expensive. Regularly check Auction House prices, comparing costs across servers if possible. Utilize gathering professions like Herbalism and Mining to reduce expenses, mirroring Roanoke, VA’s affordability. Efficient planning minimizes losses and maximizes profits.

PDF

david walker’s appeal pdf

David Walker’s Appeal: A Comprehensive Overview

David Walker’s impactful 1829 Appeal, available as a PDF download, ignited crucial conversations. It shocked the nation, prompting Southern states to offer rewards for Walker’s arrest.

The pamphlet’s wide distribution, even amongst enslaved people, fueled abolitionist fervor and remains a vital historical document for scholarly research today.

Historical Context of the Appeal

David Walker’s Appeal, in Four Articles, emerged during a particularly volatile period in American history – the late 1820s. This era was marked by intensifying debates surrounding slavery, colonization efforts, and the growing anxieties within the Southern states regarding potential slave rebellions. The PDF versions available today allow modern scholars to examine the original text in its entirety.

The American Colonization Society, founded in 1816, proposed relocating free African Americans to Africa as a solution to the perceived racial tensions. Walker vehemently opposed this, viewing it as a thinly veiled attempt to remove a growing free Black population and perpetuate slavery. His Appeal directly challenged the colonization movement, arguing it was a scheme to benefit slaveholders.

Simultaneously, the circulation of abolitionist literature was increasing, though often suppressed in the South. The discovery of free Black sailors carrying copies of Walker’s pamphlet triggered alarm and led to legislation aimed at controlling the flow of information and suppressing dissent. The context of fear and repression profoundly shaped both the creation and reception of the Appeal, making its availability as a PDF a crucial resource for understanding this period.

David Walker’s Biography

David Walker (1785-1830) was a free Black man born in Wilmington, North Carolina, whose life experiences profoundly shaped his radical abolitionist views and ultimately, his groundbreaking Appeal. He spent much of his youth in Wilmington, witnessing the brutal realities of slavery firsthand. Later, he moved to Boston, Massachusetts, where he became involved in various business ventures, including a used clothing store.

Walker was deeply engaged in the anti-slavery movement and actively participated in African American benevolent societies. He was a voracious reader and keenly aware of the political and social currents of his time. The availability of his Appeal as a PDF allows researchers to trace the intellectual roots of his arguments.

Despite facing constant threats and the risk of violence, Walker dedicated himself to challenging the institution of slavery and advocating for the rights of African Americans. His Appeal, published in 1829 and 1830, was a testament to his courage and unwavering commitment to liberation. Tragically, Walker died in 1830 under suspicious circumstances, though it was officially attributed to tuberculosis, fueling speculation of foul play related to his powerful writing, now widely accessible in PDF format.

Publication Details and Editions

David Walker’s Appeal, in Four Articles, first appeared in September 1829, published by Walker himself in Boston, Massachusetts. A revised and expanded edition followed in 1830, also published by Walker. The work was intentionally designed to be affordable and accessible, facilitating its widespread distribution amongst both free Black communities and, crucially, enslaved populations.

The initial print runs were relatively small, but the pamphlet quickly gained notoriety, leading to increased demand. Today, original editions are incredibly rare and valuable. Fortunately, modern scholarship has made the text readily available through digitized versions, including a widely circulated PDF.

The PDF versions often include scans of original pages, offering researchers a glimpse into the historical artifact itself. Various online archives and academic databases host these digital editions. The Appeal was reprinted numerous times throughout the 19th and 20th centuries, solidifying its place as a cornerstone of African American literature and a pivotal document in the fight against slavery. Accessing the PDF allows for easy study and analysis of Walker’s powerful prose.

The Four Articles of the Appeal

David Walker’s Appeal is structured into four distinct articles, each building upon the previous to present a comprehensive and damning indictment of slavery and racial injustice. The first article directly addresses the condition of African Americans, both free and enslaved, challenging prevailing narratives of their inferiority. Article II forcefully argues against the American Colonization Society’s plan to resettle free Black people in Africa, deeming it a deceptive scheme to remove a growing threat to the institution of slavery.

Article III meticulously examines the historical and contemporary realities of American slavery, exposing its brutality and inherent hypocrisy. Walker utilizes biblical arguments and appeals to natural rights to dismantle the justifications for enslavement. Finally, Article IV serves as a passionate call to action, urging enslaved people to resist their oppressors – though interpretations of this call vary, ranging from moral persuasion to advocating for rebellion.

The complete text, readily available as a PDF, reveals the interconnectedness of these arguments, demonstrating Walker’s strategic and sophisticated approach to dismantling the foundations of racial oppression. Studying the PDF allows for a detailed examination of Walker’s rhetorical techniques and the overall structure of his argument.

Article I: Addressing the Condition of African Americans

Article I of David Walker’s Appeal lays the foundational argument, directly confronting the perceived status of African Americans. Walker vehemently rejects the assertion that Black people are content with their condition, “said to be free,” and challenges the notion of their happiness under oppressive systems. He meticulously details the systemic injustices faced by both enslaved and nominally free African Americans, highlighting the denial of basic human rights and the pervasive racism embedded within American society.

Walker skillfully employs rhetorical questions and appeals to logic, demanding that readers confront the hypocrisy of a nation founded on liberty while simultaneously perpetuating slavery. He emphasizes the intellectual and moral capabilities of African Americans, dismantling racist stereotypes prevalent at the time. The PDF version of the Appeal allows for close reading of Walker’s powerful prose and his strategic use of language to expose the brutal realities of racial inequality;

This initial article sets the stage for the subsequent arguments, establishing the urgent need for change and laying the groundwork for Walker’s call to action. Accessing the PDF provides a complete understanding of this crucial opening statement.

Article II: Arguments Against Colonization

Article II of David Walker’s Appeal forcefully dismantles the pro-colonization movement, a popular proposition at the time suggesting the resettlement of free African Americans to Africa. Walker views colonization not as a benevolent solution, but as a calculated scheme to rid the United States of its free Black population and reinforce the institution of slavery. He argues that African Americans, having contributed to the nation’s wealth and development through their labor, have a rightful claim to its benefits and should not be exiled.

Walker exposes the inherent racism underpinning the colonization project, asserting that it stems from white Americans’ unwillingness to acknowledge Black people as equals. He questions the practicality and morality of forcing individuals to leave their homes and communities, highlighting the emotional and economic costs involved. The readily available PDF of the Appeal allows readers to examine Walker’s detailed refutation of colonizationist arguments.

He passionately defends the rights of African Americans to remain in the United States and fight for their freedom, framing colonization as a betrayal of American ideals. Studying the PDF reveals Walker’s strategic brilliance in countering a seemingly progressive solution with a powerful indictment of racial injustice.

Article III: Examination of American Slavery

Article III of David Walker’s Appeal delivers a searing indictment of American slavery, meticulously dismantling its justifications and exposing its brutal realities. Walker doesn’t shy away from graphic descriptions of the physical and psychological torment inflicted upon enslaved people, aiming to shock the conscience of his readers. He challenges the biblical defenses of slavery, arguing that Christianity fundamentally opposes the practice of human bondage.

Walker systematically deconstructs the racist ideologies used to rationalize slavery, demonstrating the hypocrisy of a nation founded on principles of liberty while simultaneously denying freedom to millions. The PDF version of the Appeal allows for close examination of Walker’s rhetorical strategies and his powerful use of language to condemn slavery as a moral abomination.

He argues that slavery degrades both the enslaved and the enslaver, corrupting the soul of the nation. Walker’s analysis extends beyond mere condemnation, exploring the economic and political implications of slavery, and its detrimental impact on American society. Accessing the PDF provides a crucial understanding of his comprehensive critique.

Article IV: Call to Action and Rebellion

Article IV of David Walker’s Appeal represents the most radical and controversial section, functioning as a direct call to action for enslaved African Americans. While often misinterpreted as a simple endorsement of violent uprising, Walker’s intent is more nuanced. He urges enslaved people to actively seek their freedom by any means necessary, emphasizing self-reliance and resistance against their oppressors.

Walker doesn’t explicitly advocate for immediate, widespread rebellion, but rather suggests that the threat of such action might compel slaveholders to grant emancipation. The PDF format of the Appeal allows readers to analyze the carefully constructed arguments and the passionate plea for liberation. He appeals to their inherent dignity and right to freedom, framing resistance as a righteous act.

He also directs his message to free Black communities, urging them to support and assist those still enslaved; The PDF version reveals Walker’s strategic use of language to inspire hope and courage, while simultaneously warning of the dire consequences of continued oppression. This article solidified the Appeal’s reputation as a dangerous and incendiary document.

Impact and Reception of the Appeal

David Walker’s Appeal, readily accessible today as a PDF, profoundly impacted both the abolitionist movement and the Southern states. Its publication in 1829 sent shockwaves through American society, sparking intense debate and fear. The document’s fiery rhetoric and direct appeal to enslaved people were unprecedented, challenging the prevailing racial hierarchy.

Northern abolitionists largely embraced the Appeal, recognizing its power to galvanize support for emancipation. The PDF format facilitated its wider circulation amongst anti-slavery societies and activists. However, Southern reaction was overwhelmingly hostile. State legislatures swiftly enacted laws prohibiting the distribution of the pamphlet, even offering rewards for Walker’s capture and prosecution.

The Appeal fueled anxieties about slave revolts, leading to increased surveillance of free Black communities and stricter control over enslaved populations. Examining the PDF reveals the document’s enduring legacy as a catalyst for social change, forcing a national conversation about slavery and racial justice. It remains a cornerstone of African American literary and political history.

Southern Reaction and Legislation

The publication of David Walker’s Appeal, now widely available as a PDF, triggered a fierce backlash across the Southern states. Fearful of its incendiary message and potential to incite rebellion, Southern lawmakers responded with swift and draconian legislation. The Appeal’s call for enslaved people to rise up against their oppressors was perceived as a direct threat to the institution of slavery and the social order.

Numerous states, including Georgia, North Carolina, and Virginia, passed laws specifically outlawing the circulation of the Appeal. These laws often carried severe penalties, including imprisonment and fines, for anyone caught possessing or distributing the pamphlet, even in PDF form. Rewards were offered for information leading to Walker’s arrest, demonstrating the level of alarm the document generated.

Furthermore, Southern authorities increased surveillance of free Black communities, suspecting them of disseminating the Appeal. Restrictions were placed on the education of enslaved people and free African Americans, aiming to suppress literacy and prevent access to such radical texts. The PDF version, ironically, now allows for broader access despite these historical attempts at suppression.

Walker’s Distribution Network

David Walker meticulously cultivated a distribution network to disseminate his Appeal, even before its widespread availability as a PDF. Recognizing the power of reaching both free Black communities and enslaved populations, he strategically utilized existing networks of free Black sailors. These sailors, traveling along coastal routes, served as crucial conduits for transporting and distributing the pamphlet.

Walker actively sought to place the Appeal in the hands of African American leaders and organizations in Northern cities, who then further circulated it within their communities. He understood the importance of grassroots organizing and relied on trusted individuals to spread his message. The pamphlet’s relatively small size facilitated its clandestine transport and distribution.

The discovery of sailors carrying copies of Walker’s work prompted the aforementioned Southern legislative responses. Despite these efforts, the network proved remarkably resilient. Today, the ease of sharing a PDF version highlights the contrast with the risks Walker and his associates faced, yet echoes the original intent of broad dissemination.

The Appeal and the Abolitionist Movement

David Walker’s Appeal, now readily accessible as a PDF, profoundly impacted the burgeoning Abolitionist Movement. Published in 1829, it represented a radical departure from earlier, more gradualist approaches to ending slavery. Walker’s fiery rhetoric and explicit call for enslaved people to rebel galvanized abolitionists and challenged prevailing notions of racial inferiority.

While some abolitionists initially hesitated due to the Appeal’s confrontational tone, its powerful arguments ultimately broadened the scope of the movement. It forced a reckoning with the brutality of slavery and the urgent need for immediate action. The pamphlet’s emphasis on Black agency and self-determination resonated deeply with those advocating for full emancipation and racial equality.

The Appeal served as a crucial text for abolitionist societies and speakers, providing compelling evidence of the enslaved people’s desire for freedom. Even today, the PDF version continues to inspire activists and scholars, demonstrating the enduring relevance of Walker’s message and its lasting contribution to the fight for racial justice.

Controversies and Interpretations

David Walker’s Appeal, easily found as a PDF today, sparked intense controversy upon its release and continues to generate debate among scholars. Southern states immediately condemned it as incendiary, fearing it would incite slave rebellions, and enacted laws to suppress its circulation, even offering rewards for Walker’s capture.

Interpretations of the Appeal vary. Some view Walker as a pragmatic strategist, aiming to leverage the threat of rebellion to force concessions from slaveholders. Others see him as a genuine advocate of violent revolution, believing it the only path to liberation. The question of Walker’s intended audience – free Black people or enslaved individuals – also remains a point of contention.

Modern scholarship explores the Appeal’s complex relationship to Black intellectual traditions and its influence on subsequent abolitionist thought. The readily available PDF allows for closer textual analysis, revealing nuances often overlooked in earlier interpretations. Despite ongoing debates, the Appeal remains a pivotal text in understanding the fight against slavery and its enduring legacy.

Availability of the Appeal in PDF Format

David Walker’s groundbreaking Appeal is remarkably accessible today, largely due to its digitization and widespread availability in PDF format. Numerous online repositories offer free access to scanned versions of the original 1829 and 1830 editions, facilitating scholarly research and public engagement with this crucial historical document.

Websites like archive.org and various university libraries host high-quality PDF scans, often including both the complete text and accompanying metadata. These digital versions allow researchers to easily search the text, copy passages, and analyze Walker’s arguments in detail. The availability of a searchable PDF has significantly broadened access to the Appeal, overcoming the limitations of physical copies.

Furthermore, some PDF versions include supplementary materials, such as scholarly introductions and annotations, providing valuable context for understanding the Appeal’s historical significance. This ease of access ensures that Walker’s powerful message continues to resonate with contemporary audiences, fostering ongoing dialogue about race, freedom, and social justice.

Scholarly Resources and Further Reading

Extensive scholarly work surrounds David Walker’s Appeal, offering deeper insights into its context, impact, and enduring legacy. Key resources include Albert Curry’s “The Free Blacks in Urban America, 1800-1850,” providing crucial background on the free Black communities Walker addressed. Alexander Keyssar’s “The Right to Vote” also offers relevant historical context.

The Journal of Pan-African Studies (2009 eBook) features a dedicated study of Walker’s work, analyzing its arguments and rhetorical strategies. Researchers exploring the PDF version of the Appeal should consult these sources to enrich their understanding. Numerous academic articles, accessible through databases like JSTOR and Project MUSE, further dissect the Appeal’s significance.

For a broader understanding of the period, consider works on the abolitionist movement and antebellum American history. Examining the Southern reaction to the Appeal, documented in legislative records, is also vital. These resources, alongside the readily available PDF, provide a comprehensive foundation for studying Walker’s revolutionary text.

PDF

sheva brachot pdf

Sheva Brachot PDF: A Comprehensive Guide

Sheva Brachot, the seven wedding blessings, are readily available in PDF format for convenient access. These PDF resources compile the traditional Hebrew texts and translations,
facilitating proper recitation during celebrations.

Numerous online platforms offer downloadable Sheva Brachot PDF guides, catering to diverse liturgical preferences and community customs. These PDFs often include explanatory notes.

What are Sheva Brachot?

Sheva Brachot (שבע ברכות), literally “seven blessings” or birkot nissuin (“wedding blessings”), represent a central and joyous component of Jewish marriage celebrations. These blessings aren’t merely recited during the wedding ceremony itself, under the chupah, but are also traditionally repeated at festive meals held throughout the seven days following the wedding.

The tradition stems from a deep-rooted historical practice, dating back to biblical times, where a period of celebration accompanied a new marriage. The seven blessings themselves are a carefully curated collection of praises, petitions, and expressions of joy, directed towards God and focused on the newly married couple’s future happiness.

Each blessing carries a specific theme, ranging from gratitude for creation and the gift of wine, to hopes for Jerusalem’s rebuilding and the couple’s enduring love and peace. Accessing these blessings is simplified through readily available PDF resources, offering both the Hebrew text and English translations. These PDFs ensure accurate recitation and understanding of this beautiful tradition.

The Sheva Brachot aren’t simply a formality; they are a powerful expression of communal support and a heartfelt wish for a blessed and fulfilling marriage.

The Historical Origins of Sheva Brachot

The roots of Sheva Brachot extend deep into Jewish history, evolving over centuries from ancient customs to the formalized practice we know today. While the specific wording of the seven blessings wasn’t always fixed, the concept of a seven-day celebration following a wedding is demonstrably ancient, with origins traceable to biblical periods.

Evidence suggests that during the late Second Temple period, additions were made to the blessings, including a specific acknowledgement of God bringing together the first couple, Adam and Eve. This highlights a continuous development and adaptation of the tradition. The seven-day celebration itself likely stemmed from a desire to publicly acknowledge and celebrate the new union, fostering communal joy and support.

Over time, the blessings became standardized, reflecting a blend of biblical allusions, rabbinic interpretations, and poetic expressions of hope for the couple’s future. Today, accessing historical context and the standardized texts is made easier through PDF resources. These PDFs often include historical notes alongside the blessings themselves.

Understanding this historical evolution enriches the experience of reciting and participating in the Sheva Brachot tradition, connecting us to generations of Jewish couples and communities.

Biblical Roots and Development

While the precise formulation of Sheva Brachot isn’t explicitly detailed in the Torah, the underlying principles find strong biblical roots. The concept of blessing marriage and celebrating new unions is present in the narratives of the patriarchs and matriarchs, establishing a precedent for joyous acknowledgment of marital bonds.

The seven-day celebration, shiva, itself has biblical origins, linked to periods of mourning and, by extension, periods of heightened spiritual significance. Applying this timeframe to a wedding suggests a desire to imbue the new union with similar sacredness and joy. Rabbinic literature further developed these concepts, gradually shaping the blessings into their current form.

The inclusion of themes like creation, joy, and hope for Jerusalem reflects core biblical values. Modern PDF resources dedicated to Sheva Brachot often highlight these biblical connections, providing textual analysis and historical context. These PDFs serve as valuable tools for understanding the depth of the tradition.

The evolution from implicit biblical principles to explicit blessings demonstrates a continuous process of interpretation and adaptation within Jewish law and custom, readily accessible through detailed PDF guides.

The Seven Blessings: A Detailed Overview

Sheva Brachot, meaning “seven blessings,” are a central component of the Jewish wedding celebration. These blessings, recited during the chupah (wedding canopy) and at subsequent festive meals, articulate themes of joy, creation, and hope for the future. Comprehensive PDF guides provide the full Hebrew text alongside English translations, aiding in proper recitation.

The blessings progress from praising God as the Creator, to acknowledging the joy of the couple, and ultimately invoking blessings of peace and prosperity. Each blessing builds upon the previous, creating a powerful and moving expression of faith and celebration. Many PDF resources categorize each blessing individually, offering detailed explanations.

These PDFs often include transliterations for those less familiar with Hebrew pronunciation, ensuring broader participation. Understanding the nuances of each blessing enhances the spiritual significance of the ceremony. The blessings aren’t merely formulaic; they are deeply meaningful poetic expressions.

Accessing a well-structured Sheva Brachot PDF allows for a deeper appreciation of the tradition and facilitates a more meaningful experience for all involved in the joyous occasion.

The First Blessing: Blessing over Wine

The inaugural blessing of the Sheva Brachot centers around the sanctification of wine, a symbol of joy and celebration in Jewish tradition. This blessing, readily available in PDF format, begins the series of seven, setting a tone of gratitude and reverence. The Hebrew text, alongside English translations found in these PDFs, expresses thanks to God for creating the fruit of the vine.

This blessing isn’t simply about the wine itself; it’s a recognition of God’s provision and the inherent goodness of creation. PDF guides often highlight the importance of using kosher wine for this purpose, emphasizing the ritual significance. The blessing acknowledges God as the source of all blessings and joy.

Many Sheva Brachot PDF resources provide detailed explanations of the blessing’s historical context and theological implications. Understanding this first blessing is crucial, as it establishes the foundation for the subsequent six. It’s a moment of mindful appreciation before the celebration truly begins.

Having a readily accessible PDF ensures accurate recitation and a deeper understanding of this foundational element of the Sheva Brachot ceremony.

The Second Blessing: Praising God as Creator

The second blessing within the Sheva Brachot sequence elevates God as the ultimate Creator of all existence. Easily found within comprehensive PDF guides, this blessing expresses profound gratitude for the very fabric of the universe and humanity’s place within it. The Hebrew text, meticulously preserved in these PDF resources, praises God for bringing forth life and sustaining creation.

This blessing isn’t merely a poetic expression; it’s a theological statement affirming God’s power and benevolence. PDF versions often include commentaries explaining the connection between creation and the new couple’s ability to build a family and continue God’s work. It acknowledges God’s ongoing involvement in the world.

Many Sheva Brachot PDFs emphasize the importance of reciting this blessing with intention, recognizing the miracle of existence. It serves as a reminder of the divine source of all blessings bestowed upon the couple. The blessing highlights God’s eternal nature.

Accessing this blessing through a PDF ensures accurate pronunciation and a deeper appreciation for its theological significance during the joyous occasion.

The Third Blessing: Joy and Celebration

The third blessing of the Sheva Brachot is a vibrant expression of pure joy and celebration, readily accessible within detailed PDF guides. This blessing specifically focuses on the happiness bestowed upon the newly married couple, acknowledging the delight and festivity surrounding their union. PDF versions often highlight the importance of communal rejoicing.

This blessing isn’t simply a wish for happiness; it’s a recognition of the inherent holiness within joy itself. Sheva Brachot PDF resources often explain how this blessing connects to the mitzvah of celebrating joyous occasions. It emphasizes the spiritual significance of shared happiness.

The Hebrew text, carefully transcribed in these PDFs, invokes God’s blessing upon the couple, requesting continued joy and fulfillment in their lives together. It’s a powerful affirmation of the positive energy surrounding the marriage. Many PDFs include translations and transliterations.

Utilizing a PDF ensures accurate recitation and a deeper understanding of this blessing’s role in amplifying the celebratory atmosphere of the wedding and subsequent festive meals.

The Fourth Blessing: Future Happiness

The fourth blessing within the Sheva Brachot sequence looks forward to the couple’s future happiness, a sentiment beautifully preserved in readily available PDF resources. These PDF guides meticulously present the Hebrew text alongside translations, clarifying the blessing’s hopeful message. It specifically asks for God’s continued blessing upon the couple’s shared life.

This blessing isn’t merely a wish for a pleasant future; it’s a proactive invocation of divine favor, requesting that God grant the couple lasting joy, peace, and prosperity. Sheva Brachot PDF documents often explain the theological underpinnings of this request, linking it to God’s role as the source of all blessings.

PDF versions frequently include commentary explaining how this blessing anticipates the couple building a loving home and raising a family. It’s a prayer for a future filled with contentment and fulfillment. Accessing a PDF ensures accurate pronunciation and understanding.

By utilizing a PDF, individuals can confidently participate in reciting this blessing, contributing to the positive energy and hopeful outlook surrounding the newly married couple’s journey ahead.

The Fifth Blessing: Hope for Jerusalem

The fifth blessing of the Sheva Brachot uniquely shifts focus from the couple to a broader, communal hope – the rebuilding of Jerusalem. Conveniently, comprehensive Sheva Brachot PDF documents contain this blessing, offering both the original Hebrew and accurate English translations for easy understanding and recitation.

This blessing isn’t simply a historical reference; it’s a powerful expression of longing for a future Messianic era characterized by peace and divine presence in the Holy City. PDF resources often explain the historical context of this inclusion, linking it to the Jewish people’s enduring connection to Jerusalem.

Many Sheva Brachot PDF guides highlight that incorporating this blessing into a wedding ceremony acknowledges that personal happiness is intertwined with the well-being of the Jewish people and the fulfillment of God’s promises. It’s a reminder of collective responsibility.

Accessing a PDF version allows for precise pronunciation and a deeper appreciation of the blessing’s significance. It’s a poignant moment within the Sheva Brachot, connecting the couple’s joy to the broader narrative of Jewish history and hope.

The Sixth Blessing: Joy of the Couple

The sixth blessing within the Sheva Brachot is a direct and heartfelt wish for the couple’s enduring joy and companionship. Thankfully, readily available Sheva Brachot PDF resources provide the precise wording of this blessing in both Hebrew and English, ensuring accurate recitation during celebratory meals and the wedding ceremony itself.

This blessing specifically invokes God’s presence to fill the couple’s lives with happiness, harmony, and mutual respect. PDF versions often include transliterations to aid pronunciation for those less familiar with Hebrew, making participation more accessible.

Many Sheva Brachot PDF guides emphasize that this blessing isn’t merely a polite expression, but a powerful invocation of divine favor upon the newly married pair. It’s a request for continued love and understanding throughout their lives together.

Having a PDF copy allows for focused contemplation of the blessing’s meaning, enhancing the emotional impact of the moment. It’s a beautiful and intimate expression of hope for the couple’s future, central to the spirit of the Sheva Brachot.

The Seventh Blessing: A Blessing for Peace

The culminating seventh blessing of the Sheva Brachot extends beyond the couple, invoking a blessing for universal peace. Conveniently, comprehensive Sheva Brachot PDF documents contain the complete text of this blessing, facilitating its accurate and meaningful recitation during wedding celebrations and subsequent festive meals.

This blessing specifically asks for God’s favor upon Israel, praying for a time of tranquility, security, and divine presence. PDF versions often include detailed explanations of the historical and spiritual context of this plea for peace, enriching understanding.

Many Sheva Brachot PDF resources highlight the connection between marital harmony and broader societal peace, suggesting that a loving union reflects and contributes to a more peaceful world. It’s a powerful message of hope and responsibility.

Accessing a PDF copy allows for careful study and reflection on the blessing’s profound message. It serves as a reminder of the importance of striving for peace, both within the couple’s relationship and in the world at large, embodying the essence of the Sheva Brachot.

Sheva Brachot During the Wedding Ceremony (Chupah)

The recitation of the Sheva Brachot holds a central position within the Jewish wedding ceremony, specifically under the chupah (wedding canopy). Thankfully, readily available Sheva Brachot PDF guides provide the precise order and wording of these blessings for use during this sacred moment.

Typically, the groom recites the first six blessings, while the community joins in for the seventh. PDF versions often delineate which individual recites each blessing, ensuring a smooth and reverent flow to the ceremony. These documents are invaluable for wedding officiants and participants.

Many Sheva Brachot PDF resources include transliterations alongside the Hebrew text, aiding those less familiar with the language. This accessibility ensures broader participation and understanding of the blessings’ profound meaning.

Having a PDF copy readily available minimizes potential errors and allows everyone to follow along, creating a unified and spiritually uplifting experience under the chupah. It’s a vital tool for a meaningful and traditional Jewish wedding ceremony.

Recitation of Sheva Brachot at Festive Meals

Following the wedding ceremony, the tradition of reciting Sheva Brachot extends to festive meals held throughout the seven days of celebration. Conveniently, comprehensive Sheva Brachot PDF documents contain the complete set of blessings needed for these post-wedding gatherings.

During each meal, after the Birkat Hamazon (Grace After Meals), the Sheva Brachot are recited. PDF versions often include guidance on who leads the recitation and how the community participates, ensuring a harmonious and spiritually enriching experience.

These Sheva Brachot PDF resources are particularly helpful for hosts and guests alike, providing a clear and accessible text for communal recitation. They often feature both Hebrew and English translations, fostering deeper understanding and engagement.

The availability of PDFs simplifies the logistics of hosting these celebratory meals, allowing families to focus on joyfully welcoming guests and honoring the new couple. It’s a practical aid in upholding this cherished Jewish tradition throughout the week-long festivities.

The Role of the Minyan

A minyan, a quorum of ten Jewish adults, is essential for the proper recitation of Sheva Brachot, particularly during the wedding ceremony and at the festive meals. Thankfully, readily available Sheva Brachot PDF guides often clarify the requirements for a valid minyan.

These PDF resources emphasize that the presence of a minyan elevates the spiritual significance of the blessings, transforming a personal celebration into a communal affirmation of the couple’s union. The PDFs may also offer guidance on how to ensure a minyan is present at each meal.

When reciting Sheva Brachot at a meal, the PDFs highlight that the blessings are ideally recited in front of a minyan, with the community responding after each blessing. This communal participation amplifies the joy and blessings bestowed upon the newlyweds.

Having a Sheva Brachot PDF on hand ensures that everyone understands the importance of the minyan and their role in creating a meaningful and spiritually resonant experience for the couple and the entire community.

Sheva Brachot and the Seven Days of Celebration

The tradition of celebrating a marriage for seven days, known as Sheva Brachot, stems from biblical origins and is beautifully detailed within comprehensive Sheva Brachot PDF guides. These PDFs explain that each of the seven days following the wedding is marked by special meals where the blessings are recited.

PDF resources often outline the specific customs associated with each day, including the inclusion of additional guests and the enhancement of the celebratory atmosphere. They clarify that reciting the Sheva Brachot at each meal throughout the seven days extends the joy and blessings of the wedding.

A well-structured Sheva Brachot PDF will provide the complete text of the seven blessings, enabling families to easily incorporate them into their celebratory meals. It also explains the significance of continuing the celebration, fostering a sense of community and shared happiness.

Utilizing a Sheva Brachot PDF ensures a consistent and meaningful observance of this cherished tradition, allowing the couple to bask in the blessings and support of their community for an entire week.

Variations in Sheva Brachot Recitation

While the core text of the Sheva Brachot remains consistent, Sheva Brachot PDF resources acknowledge and detail variations in recitation based on community customs and specific occasions. These PDF guides often present multiple versions of the blessings, reflecting differing Ashkenazi and Sephardi traditions.

Some PDFs highlight additions or alterations made for specific guests of honor, or during the seven days of celebration. They may include variations for second marriages or for converts, offering appropriate wording for these unique circumstances.

A comprehensive Sheva Brachot PDF will explain the nuances of these variations, clarifying when and how to implement them. It might also provide transliterations and pronunciations to assist those unfamiliar with Hebrew.

Understanding these variations, as presented in a detailed Sheva Brachot PDF, allows for a more inclusive and meaningful experience for all participants, ensuring the blessings resonate with the specific context of the celebration and the diverse backgrounds of those present.

Sheva Brachot for Converts

Sheva Brachot PDF resources dedicated to inclusive celebrations often include specific guidance for weddings involving converts to Judaism. These PDFs recognize the unique significance of the occasion and offer adapted blessings that acknowledge the convert’s journey.

Typically, a Sheva Brachot PDF will suggest adding a blessing expressing gratitude for bringing the convert closer to Judaism, celebrating their acceptance into the community, and acknowledging their commitment to Jewish life. These additions are often incorporated into the sixth blessing, traditionally focused on joy for the couple.

Some PDFs provide multiple options for these supplemental blessings, allowing the couple and their officiant to choose wording that best reflects their personal connection and the convert’s story. They may also offer guidance on appropriate timing for reciting the additional blessing.

Utilizing a Sheva Brachot PDF with specific guidance for converts ensures a welcoming and affirming experience, honoring their spiritual path and celebrating their integration into the Jewish community through the sacred bond of marriage.

Sheva Brachot and Second Marriages

Sheva Brachot PDF guides addressing second marriages often provide nuanced guidance, acknowledging the different emotional and halakhic considerations. These PDF resources recognize the joy of a new union while respectfully acknowledging past experiences.

A common approach detailed in these PDFs is to omit references to the “first time” or “newly created” within the blessings. This sensitivity avoids potentially painful reminders for either partner. Instead, the focus shifts to celebrating the present happiness and future together.

Some Sheva Brachot PDFs suggest incorporating a blessing expressing gratitude for the opportunity to find love again and build a new life with a cherished partner. This addition acknowledges the resilience and hope inherent in a second marriage.

It’s crucial to consult with a rabbi familiar with the couple’s specific circumstances when selecting a Sheva Brachot PDF for a second marriage. The goal is to create a meaningful and joyous celebration that honors both individuals and their commitment to a shared future.

Finding Sheva Brachot Texts in PDF Format

Locating Sheva Brachot PDF texts is remarkably straightforward in today’s digital age. Numerous websites dedicated to Jewish traditions and liturgy offer downloadable PDF versions of the seven blessings, often in both Hebrew and English translation.

A simple online search using keywords like “Sheva Brachot PDF,” “seven blessings PDF,” or “birkat nissuin PDF” will yield a wealth of results. Many synagogues and Jewish community centers also provide PDFs on their websites for members and visitors.

Popular platforms like Sefaria and Chabad.org host comprehensive collections of Jewish texts, including readily accessible Sheva Brachot PDFs. These resources frequently offer variations for different communities and customs.

When selecting a Sheva Brachot PDF, consider the desired level of detail, translation accuracy, and adherence to specific liturgical traditions. Ensure the PDF is clearly formatted and easy to read for comfortable use during celebrations.

Resources for Sheva Brachot PDFs Online

Several excellent online resources provide readily available Sheva Brachot PDF documents. Sefaria (sefaria.org) stands out as a comprehensive digital library of Jewish texts, offering multiple versions of the blessings in various formats, including easily downloadable PDFs.

Chabad.org (chabad.org) is another valuable source, providing Sheva Brachot PDFs alongside detailed explanations of their meaning and significance. Their resources cater to a broad audience, offering both traditional and contemporary interpretations.

My Jewish Learning (myjewishlearning.com) features articles and resources related to Jewish life cycle events, often including links to downloadable Sheva Brachot PDF texts. These resources are particularly helpful for understanding the context of the blessings.

Additionally, many individual synagogues and Jewish educators maintain websites with downloadable Sheva Brachot PDFs tailored to their community’s customs. A targeted online search can uncover these localized resources, ensuring alignment with specific traditions.

Exploring these platforms ensures access to accurate and reliable Sheva Brachot PDF materials.

Printing and Using Sheva Brachot PDFs

Printing Sheva Brachot PDFs is straightforward; ensure your printer settings are optimized for clear text and consider using heavier paper stock for durability during use at festive meals. Double-sided printing conserves paper, a mindful practice.

When using a printed Sheva Brachot PDF, it’s customary for the person reciting the blessings to have a clear, legible copy. Many prefer to use a bookmark to easily locate each blessing within the document.

Digital Sheva Brachot PDFs are also convenient for use on tablets or e-readers during celebrations. Ensure the device is fully charged and the screen brightness is adjusted for comfortable reading in various lighting conditions.

Some individuals choose to project the Sheva Brachot PDF onto a screen during the wedding meal, allowing the entire gathering to follow along. This fosters a sense of communal participation.

Regardless of the method—printed or digital—familiarizing yourself with the text beforehand enhances the meaningful recitation of these beautiful blessings.

Customizing Sheva Brachot PDFs for Specific Needs

While readily available Sheva Brachot PDFs are excellent resources, customization can cater to unique preferences or community traditions. Software allows adding names of the couple and their parents directly into the PDF document.

For communities with specific liturgical variations, editing a Sheva Brachot PDF to reflect those nuances ensures accurate recitation. This might involve adjusting phrasing or including additional verses.

Individuals with visual impairments may benefit from increasing the font size within the PDF or converting it to a format compatible with screen readers. Accessibility is paramount.

Creating a personalized Sheva Brachot PDF can also involve adding decorative elements or incorporating the wedding’s color scheme, enhancing its aesthetic appeal for the celebration.

Remember to always double-check any customizations against established halachic guidelines to maintain the integrity of the blessings. Consulting with a rabbi is advisable when making significant alterations to the traditional text within the PDF.